Windows can be installed directly to an iSCSI Target. The instructions in this page detail the steps required to install Windows NT6.* - for Windows XP/2003 (and possibly other Windows NT5.* Operating Systems) see here.
Target System - the system hosting the iSCSI Target (Server) software. For the purpose of this guide the Target System is assumed to be the same system as Tiny PXE Server.
iSCSI Target - the unique IQN (iSCSI Qualified Name) of the Target hosting the source disk that will be used to contain the Windows installation that will be Network Booted.
Client - this system needs to be PXE boot capable.
Windows Preinstallation Environment (WinPE) - WinPE 3.0 (or newer) is required for configuring and capturing Windows on the client system. WinPE can be PXE booted if required (see here). NOTE - your WinPE must match the bit type of the Operating System being installed (32-bit or 64-bit). A 32-bit WinPE will not be able to run the 64-bit installer and a 64-bit WinPE will not be able to run the 32-bit installer. During an install to iSCSI Windows Setup will configure the network adapter (and bindings) - I am not aware of any means of successfully installing to iSCSI without running setup.exe
Windows Source Files - you will need the Windows Setup files in an accessible path (e.g. on a USB drive, on the Client system, or on a network share).
Disable Server Firewall - for troubleshooting purposes disabling any firewall on the server is recommended. The firewall can be enabled and configured once booting from iSCSI is confirmed to be working.
Set Up The iSCSI Target
Before installing Windows the iSCSI Target software will need to be installed and configured (see here).
After configuring the iSCSI Target there are two distinct stages involved in installing Windows NT6.* directly to an iSCSI Target -
Stage 1 - boot\chainload iPXE > SANHOOK (attach) the iSCSI Target and boot WinPE >
Stage 2 - after running Setup.exe during Stage 1, the system will reboot. Following the reboot, boot\chainload iPXE > SANBOOT the iSCSI Target and complete setup.
Connection Authentication
NOTE - as previously mentioned in the iSCSI (Windows Targets) page of this guide, some Targets will only allow authenticated connections - Client/Host system identifiers may need to be specified for connections to be made. pyTarget for example will only allow connections from a Client/Host whose IQN has been added to a filter list. Microsoft iSCSI Software Target 3.3 also requires Client/Host identification.
A simple workaround is to add an iPXE command to set the Client IQN prior to the SANHOOK or SANBOOT command being issued. E.g. add Host name iqn.client to any filter list, and add the following iPXE command to the iPXE script/menu/command-line -
set initiator-iqn iqn.client
E.g.
Stage 1
You will need the unique identifier (the IQN) of your iSCSI Target - E.g. iqn.iSCSI-target1.
WinPE is required to start the installation process. In the example below a WinPE .ISO will be booted from the Server using memdisk (path to the WinPE ISO is \iso\WinPE.iso). wimboot can be used as an alternative to memdisk (see here for a sample script), as can chain-loading pxeboot.0 (see here for a sample script).
Sample iPXE script for stage 1 (DHCP)
Sample iPXE script for stage 1 (Proxy DHCP)
Breaking down the entries in the script above -
#!ipxe - identifies the file as an iPXE script.
set boot-url http://${next-server} - define environment variable boot-url as http://${next-server}. next-server is a pre-defined iPXE variable - the IP address of the Proxy DHCP server.
set gateway 0.0.0.0 - manually setting the gateway to 0.0.0.0 is reported to be a workaround for some issues when booting Windows via SAN. There are some reports that failing to set the gateway to 0.0.0.0 may result in "INACCESSIBLE BOOT DEVICE" (0x7b) errors during boot. There are other reports that setting the gateway to 0.0.0.0 is a workaround for long boot times - possibly due to "...a known issue that Windows routes traffic to SAN through default gateway. It may obviously cause throughput reduction when your gateway has limited bandwidth. ..." (see here).
set keep-san 1 - prevent iPXE from detaching a SAN drive (reported to be for the sake of backwards compatibility (see here)).
SANHOOK iscsi:${next-server}::::iqn.iSCSI-target1 - attach the specified Target - in this case iscsi:${next-server}::::iqn.iSCSI-target1. See here for more information about the Target syntax.
kernel ${boot-url}/memdisk iso raw - load the memdisk kernel with iso raw parameters/arguments. The path to memdisk includes the environment variable ${boot-url} defined earlier in the script - this path will translate as http:\\192.168.1.1\memdisk.
initrd ${boot-url}/iso/WinPE.iso - load the initial ramdisk file /iso/WinPE.iso.
The following screenshot shows the output from the above script -
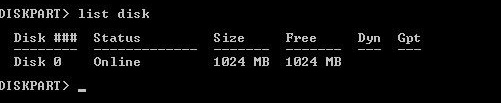
Once WinPE has loaded, run diskpart to prepare the iSCSI Target for setup. Run the List Disk command to show available hard disks. On the screenshot below the iSCSI Target was not accessible - the reason for this was due to the custom WinPE not having initialized the network....
...after running the wpeutil InitializeNetwork command (in a command-prompt) and re-running List Disk in DiskPart, the iSCSI Target was visible -
Having identified the iSCSI Target by it's size as Disk 1, run the command sel disk 1 to give the disk focus.
NOTE - it's important to ensure that the correct disk is selected as otherwise you may end up carrying out subsequent commands on the wrong disk!
Double check it is the correct disk by running the detail disk command -
After ensuring that the correct disk was selected, create a primary type partition spanning the whole disk by running the create part pri
Mark\set the partition as active by running the active command -
Finally (quick) format the disk using NTFS with volume label SANBOOT by running the command format fs=ntfs label=SANBOOT quick -
Now exit diskpart and run setup.exe from your Windows source files directory. The following screenshot(s) show the process for installing Windows 7 - screenshots for other Windows NT6.* systems will differ.
Select the required settings and click on the Next button -
Click on the Install now button -
Accept the License terms and click on the Next button -
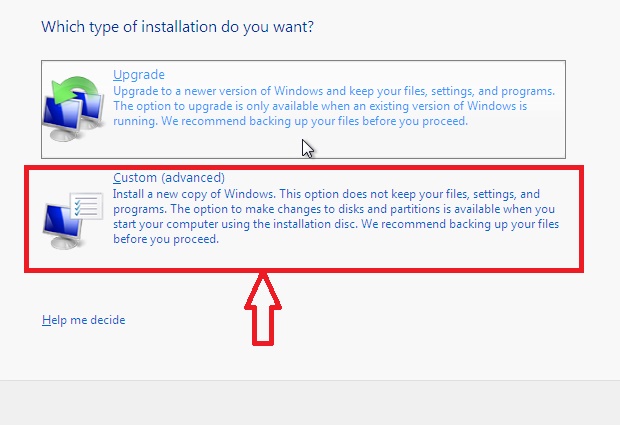
Do NOT select the Upgrade option. Click on the Custom (advanced) option -
Select the iSCSI Target disk from the list and click on the Next button -
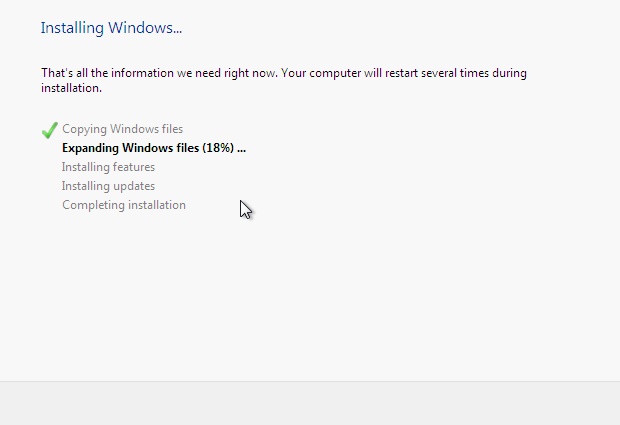
Wait for this stage of the Windows Setup process to complete and the system will reboot.
Stage 2
Sample iPXE script for stage 2 (Proxy DHCP)
Breaking down the entries in the script above -
#!ipxe - identifies the file as an iPXE script.
set gateway 0.0.0.0 - manually setting the gateway to 0.0.0.0 is reported to be a workaround for some issues when booting Windows via SAN. There are some reports that failing to set the gateway to 0.0.0.0 may result in "INACCESSIBLE BOOT DEVICE" (0x7b) errors during boot. There are other reports that setting the gateway to 0.0.0.0 is a workaround for long boot times - possibly due to "...a known issue that Windows routes trafic to SAN through default gateway. It may obviously cause throughput reduction when your gateway has limited bandwidth. ..." (see here).
set keep-san 1 - prevent iPXE from detaching a SAN drive (reported to be for the sake of backwards compatibility (see here)).
SANBOOT iscsi:${next-server}::::iqn.iSCSI-target1 - boot from the specified Target. In this case iscsi:${next-server}::::iqn.iSCSI-target1.
The following screenshot shows the output from the above script -
Windows setup will complete as normal, albeit on the iSCSI Target -
Configure Windows as required - e.g. set username, computername, etc.
The screenshot below was taken from a running Windows 7 system booted from an iSCSI Target -
iSCSI URI Syntax
The format for iSCSI URI's is - iscsi:[servername]:[protocol]:[port]:[LUN]:[targetname]
Where -
servername - is the IP address or DNS name of the iSCSI Target. In iPXE scripts, environment variables including ${next-server} or ${dhcp-server} can be used.
protocol - this field can be left blank. The protocol used for iSCSI is TCP.
port - is the port used for connections to the iSCSI Target. The default port for iSCSI is 3260 - this field can be left blank if the default port is in use for incoming connections to the iSCSI Target software.
LUN - leave blank and use default (0). The LUN format seems unnecessarily complex - see here and here.
targetname - unique IQN of the Target being booted/attached.
If default settings are used for the protocol, port and LUN fields then these fields can be left blank. The following entries for example will all function (assuming the Target IP address is 192.168.1.1 and that this IP address is correctly set as the dhcp-server variable when iPXE is booted) -
iscsi:192.168.1.1:tcp:3260:0:iqn.iSCSI-target1
iscsi:${dhcp-server}:tcp:3260:0:iqn.iSCSI-target1
iscsi:192.168.1.1::::iqn.iSCSI-target1
iscsi:${dhcp-server}::::iqn.iSCSI-target1
iPXE settings
Remember to ensure that the required files are copied to your Tiny PXE Server root directory -
iPXE menus are essentially scripts. It's also possible to specify individual scripts for each stage of the iSCSI installation process by using the altfilename option in config.ini. For example, create a script in the TFTP root directory C:\pxesrv\files\iscsi1.ipxe > add altfilename=iscsi1.ipxe to config.ini. NOTE - remember to change any references to ${dhcp-server} to ${next-server} if using ProxyDHCP.
Stage 1 - Sample iPXE script for Stage 1 -
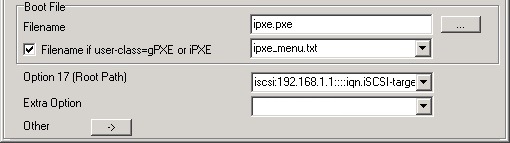
Stage 2 - Either enter a path to a script as in the instructions above, or set the iSCSI Target in Option 17 (Root Path). Settings required for opt17 in config.ini