
ISO images can be difficult to boot via PXE. On BIOS systems, files loaded into memory (e.g. via memdisk or the Grub4dos map command) are implemented using INT 13h BIOS interrupt calls - as a consequence any operating systems that use real mode disk access (e.g. DOS) will still be able to access the (memory) loaded ISO. Operating systems that run in protected mode (e.g. Windows NT, Linux, etc) will no longer be able to access the loaded ISO once the protected mode kernel is running.
There are some exceptions to this -
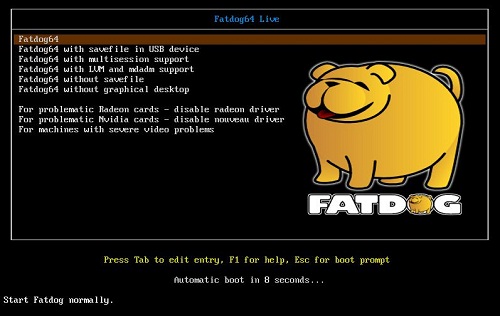
FatDog ISO boot menu screenshot -

RAM based Windows Preinstallation Environments (WinPE) can also be loaded from ISO files - the initial stages of the boot process run in real mode, loading the required files (*.wim and *.sdi) into RAM > control is then passed to the kernel running in protected mode - preserving the memory mapped files due to WinPE's built in ramdisk driver. At this stage the ISO mapped to RAM is lost, however no further files are required from it so the boot process can complete successfully.
firadisk and winvblk are third party Windows RAM disk drivers capable of preserving mappings of files loaded into RAM via memdisk and the Grub4dos map command - if a Windows system contains these drivers then the ISO will still be accessible once the Operating System has loaded. If either of these drivers is correctly integrated into a Windows installation ISO file then it's possible to install Windows via a RAM loaded ISO file.
Three different methods for booting ISO files are covered in this document -
Quick note on ISO booting - if using iPXE then it's possible to boot ISO files from an external HTTP server - i.e. via the internet! There are two examples in the iPXE Scripts section of this page.
The following examples demonstrate booting from ISO files via PXE. Copy the following ISO files to C:\pxesrv\files\iso\ -
Directory structure -
Now add a menu entry for your preferred Network Bootstrap Program -
Remember to ensure that the required files are copied to your Tiny PXE Server root directory -
Add the following to C:\pxesrv\files\pxelinux.cfg\default (create this file if required) -
Click on one of the following for sample config.ini settings (edit to reflect your own setup) -
Remember to ensure that the required files are copied to your Tiny PXE Server root directory -
Add the following to C:\pxesrv\files\menu.lst\default (create this file if required) -
Click on one of the following for config.ini settings (edit to reflect your own setup) -
Remember to ensure that the required files are copied to your Tiny PXE Server root directory -
Screenshot (detail) of Fatdog64-701.iso being loaded into RAM using HTTP -

Add the following to the menu section of C:\pxesrv\files\ipxe_menu.txt (create this file if required) -
Add the following to the menu options section of C:\pxesrv\files\ipxe_menu.txt -
E.g. -
NOTE - remember to change set boot-url http://${dhcp-server} if using ProxyDHCP.
Click on one of the following for config.ini settings (edit to reflect your own setup) -
iPXE menus are essentially complicated scripts. It's also possible to specify a script using the altfilename option in config.ini. The two samples below can be used to boot ISO images over the internet.
Boot FatDog64 (version 7.01) from a web server -
Boot Slitaz (version 4.0) from a web server -
Document date - 28th February 2017(DRAFT)