This page is a work in progress. I have included a walkthrough that can hopefully be adapted and used as a guide to implement this feature. The following paths are used throughout this section -
Sections in this page -
Remote Installation Services (RIS) is a Windows 2000/XP/2003 network deployment solution. A Boot Image Negotiation Layer (BINL) service is required - the Tiny PXE Server executable includes native support for this service.
Installing Windows XP is covered below - the process for installing Windows 2000/2003 is very similar. Setting up Tiny PXE Server to have options for installing more that one Windows NT 5.* Operating System is not so straightforward and requires hex editing Windows boot files to replace text strings for file searches - this is beyond the current scope of this guide, but is covered here - http://diddy.boot-land.net/pxe/files/ris_files.htm
Windows 2000 boot files may require a name change as in some circumstances the file names may need to be pre-appended with the filename of the network bootstrap program used to load them (e.g. rename ntdetect.com to pxelinux.0ntdetect.com) - refer to the guide referenced in the preceding paragraph.
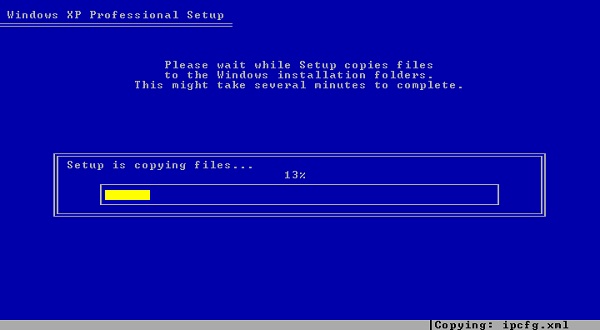
Screenshot of RIS installation -
Create the directory winxp in the root directory (C:\pxesrv\files\winxp)
Copy the I386 directory (and contents) from your Windows XP source to C:\pxesrv\files\winxp (you should now have C:\pxesrv\files\winxp\I386\).
Having copied Windows installation files to the C:\pxesrv\files\winxp directory -
Tiny PXE Server directory structure -
A configuration file is required for RIS installations. The filename is hardcoded as winnt.sif - we will be using C:\pxesrv\files\winnt.sif. This file MUST contain the following information (edit paths to reflect your own setup) -
To ensure that the Client PC's hard disk is not repartitioned/formatted automatically then add the following -
Various other entries can be added to fully automate the installation. A Sample winnt.sif is included in the Tiny PXE Server download. My own sample file -
winnt.sif settings can be found in ref.chm (Extract from Windows source CD/files - it's in \SUPPORT\TOOLS\DEPLOY.CAB). Alternatively refer to - http://unattended.msfn.org/unattended.xp/view/web/19/
To complete a network installation of Windows 5.* (XP/2000/2003) a driver is required for the client PC's network adapter - the driver .inf files can be used by the BINL service built into Tiny PXE Server to identify the name of the driver .sys file so that the correct driver is loaded - this information is requested in the form of the network adapters VID and PID numbers.
The driver .inf file should be copied to the C:\pxesrv\files\INF directory. Multiple .inf files can be copied to this path to support a range of adapters.
As an alternative to using the driver .inf file it's possible to use nics.txt - this file should be copied to the same directory as the network bootstrap program startrom.0. A sample nics.txt is included in the Tiny PXE Server download. My own (created from DriverPack LAN 12.05 for Windows 2000/XP/2003 (x86)) is available here.
In addition to the driver .inf files (or nics.txt) the corresponding driver .sys are also required. These should be copied to your Windows source file directory - C:\pxesrv\files\winxp\I386.
To support a wide range of network adapters, download DriverPack LAN 12.05 for Windows 2000/XP/2003 (x86) and extract all .inf and .sys files from the download. The following batch file can be used to extract these files (7za.exe required) -
The Server must be set up to share the TFTP root folder (C:\pxesrv\files) in order for the RIS installation to complete - this must be configured as a null session share (a network share with no password protection required for connections with anonymous connections allowed (e.g. guest account)).
To Share the C:\pxesrv\files directory as sharename files -
Tested in Windows 7 - should apply to Windows 8/8.1.
To Share the C:\pxesrv\files directory as sharename files -
Now open the Network and Sharing Centre (Control Panel > All Control Panel Items > Network and Sharing Centre) > select Change advanced sharing settings > select Turn off password protected sharing > click on Save changes.
The most basic configuration requires setting startrom.0 as either the Boot File - Filename option (filename=startrom.0 in config.ini) or the Option 67 (Boot File Name) option (opt67=startrom.0 in config.ini).
Ensure that the BINL daemon is enabled - tick the BINL checkbox in the GUI or add binl=1 to config.ini.
It's also possible to chainload startrom.0 from another network bootstrap program - including grub4dos, iPXE and PXELINUX.
Sample PXELINUX menu entry (add to C:\pxesrv\files\pxelinux.cfg\default) -
Sample Grub4dos menu entry (add to C:\pxesrv\files\menu.lst\default) -
Sample iPXE menu entry (add to C:\pxesrv\files\ipxe_menu.txt ) -
If you experience any errors with the built in BINL service then try an alternative. A py2exe converted executable of Gianluigi Tiesi's BINL service (see here) is available here. This can be used in conjunction with Tiny PXE Server - ensure that the Tiny PXE Server BINL service is not running at the same time!
Copy the driver .inf and .sys files as per the instruction in the Adding Network Adapter Drivers section.
Extract the contents of binl.zip. Run the command infparser.exe C:\pxesrv\files\INF (changing the path to your .inf files as required). This will create two files - nics.txt and devlist.cache
Now run binlsrv.exe - leaving the window open.
Document date - 28th February 2017(DRAFT)