
This project has been designed to be simple to use - with a relatively fast build process. For a more fully featured WinPE/WinFE experience it is possible to use the Windows Assessment and Deployment Kit (ADK) with added optional components (previously referred to as packages) to support additional features. The ADK script can be used to build WinPE 4.0 / 5.x /10.x.
A full list of the optional components included with the ADK is available here - although this page covers Windows 8.1 Optional Components, the majority are also supported in Windows 8 and Windows 10. Optional Components include (limited) .NET Framework support and the Windows PowerShell.
This page will give an overview of how to include optional components using the ADK script.
NOTE - to use an ADK build in Mini-WinFE you will need to create a cache after creating a WinPE file using this script, then create a cache using the Tools > Cache Files script.
The Tools > ADK script supports the following ADK versions -
The ADK script has a tab effect interface. Select the Tools > ADK script in the directory tree (the left panel in the WinBuilder User Interface) and click on one of the Options # buttons to toggle between the different options.
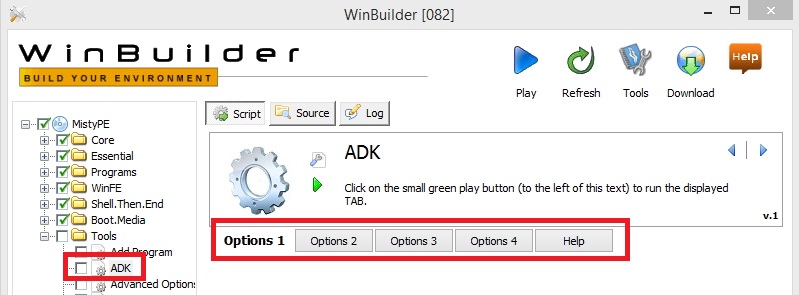
To run the selected Tab, click on the small green play button to the right of the scripts icon -

The different Options are covered below -
Options 1 is used to build WinPE from the ADK - it should be used in conjunction with Options 2 (used to select any required Optional Components).
Use Options 1 to select the required processor architecture, ADK version, and ADK Work Directory.
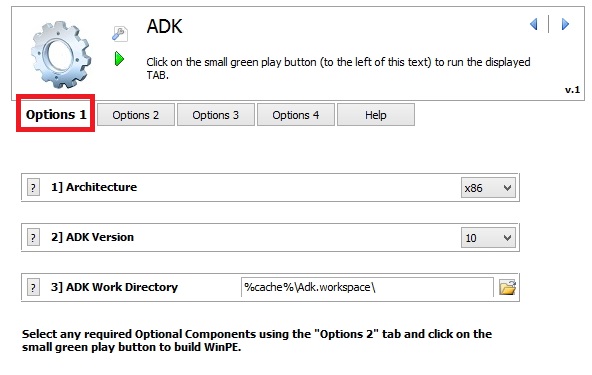
The ADK will already need to be installed before running this option. Prior to running this option, install the required ADK manually, or use Options 4 to download and Options 3 to install.
Having selected the required options in Options 1 and Options 2, ensure that one of these two tabs are displayed and click on the small green play button -
Running the script will automate the following -
The new .wim file (ADK.wim) will be created in the directory specified in Options 1 > 3] ADK Work Directory
REMEMBER - to use ADK.wim in Mini-WinFE you will need to create a cache after building ADK.wim - using the Tools > Cache Files script.
Options 2 is used to build WinPE from the ADK - it should be used in conjunction with Options 1 (used to select processor architecture, etc.).
Use Options 2 to select any required Optional Components.
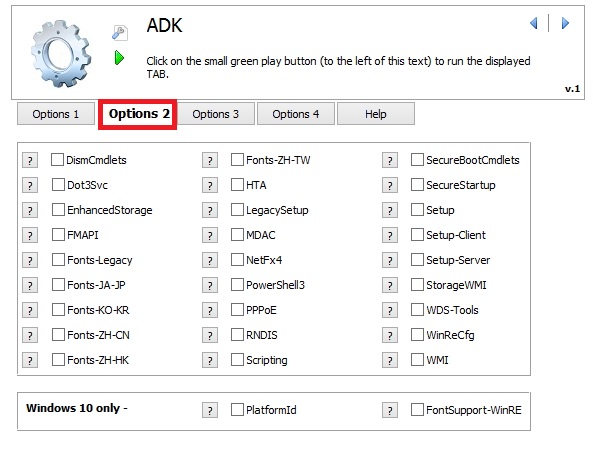
The ADK will already need to be installed before running this option. Prior to running this option, install the required ADK manually, or use Options 4 to download and Options 3 to install.
Having selected the required options in Options 2 and Options 1, ensure that one of these two tabs are displayed and click on the small green play button -
Running the script will automate the following -
The new .wim file (ADK.wim) will be created in the directory specified in Options 1 > 3] ADK Work Directory
REMEMBER - to use ADK.wim in Mini-WinFE you will need to create a cache after building ADK.wim - using the Tools > Cache Files script.
Use this option to install the required ADK components. Either manually download the ADK files, or use Options 4

Select the required ADK version using the pick list in 1] ADK Version (this is used to check the registry to see if the selected ADK is already installed on the HOST system).
Enter the path to the ADK .msi files using the browse button in 2] Path to Installers (if entering the path manually, ensure it has a trailing backslash (\)).
Having selected the required settings in Options 3, ensure that the tab is displayed and click on the small green play button -
The Options 4 can be used to download and install one of the following ADK versions -
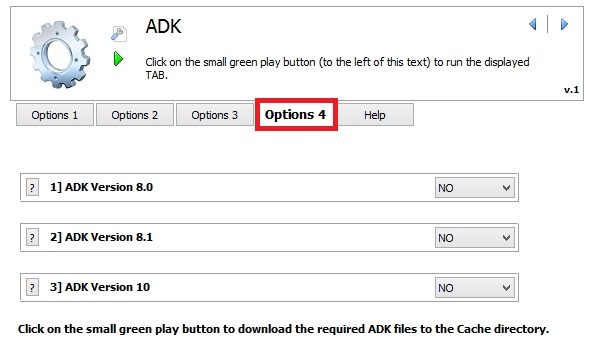
Use the scrollbox to select the required ADK version to download. E.g. Select YES for the 1] ADK Version 8.0 to download the ADK for Windows 8 setup files to the Cache.
All versions supported in this script can be downloaded, however installing the ADK's for Windows 8 and Windows 8.1 on the same system may cause conflicts.
Having selected the required downloads in Options 4, ensure that the tab is displayed and click on the small green play button -
The ADK files will be downloaded to the Cache - e.g. /Projects/Cache/ADK10/.
Document date - 27th April 2017