
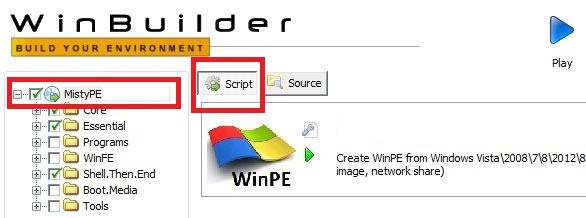
The majority of the project options are contained in the MistyPE project script - to display them, ensure that the Script button is selected and click on MistyPE at the top of the directory tree on the left....
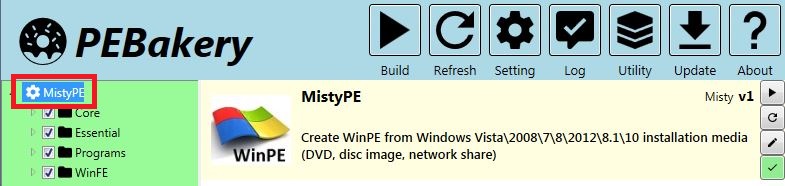
...If using the PEBakery builder, click on MistyPE at the top of the directory tree on the left....
...one of the screens below will be displayed (toggle between them by clicking on the tab buttons (Options1, Options2, etc.)) -
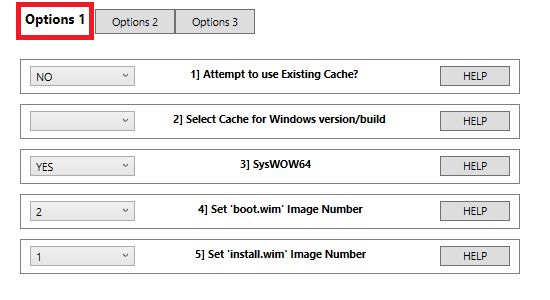

Use this option in conjunction with option 2] Select Cache for Windows version/build.
Make sure this option is set to NO for the first run of the project. Source files will be added to a cache for use when re-building the project - x86 source files will be cached to \Projects\Cache\source\build.x86, x64 source files will be cached to \Projects\Cache\source\build.x64 - where build is a Windows build version number.
As an example, if Windows 7 Service Pack 1 source files are used during a project run then these files will be cached to one of the following locations depending on the source processor architecture -
Set this option to YES to use an existing cache and change option 2 to toggle between build version caches. To select the files cached to \Projects\Cache\source\6.1.7601.x86 the following settings will need to be used in the main project script -
Use this option in conjunction with option 1] Attempt to use Existing Cache? .
This version of the project will create multiple source file caches if different Windows builds are used during project runs. Separate caches will be created based on a combination of build version numbers and processor architecture -
As an example, if previous runs of the project used Windows 7 Service Pack 1 (32-bit), Windows 8.1 (32-bit), and Windows 10.0.14393 (64-bit) sources, then these will have been added to separate file caches -
To select the files cached to \Projects\Cache\source\10.0.14393.x64 the following settings will need to be used in the main project script -
SysWoW64 is required in order to run 32-bit applications on a 64-bit WinPE. The following information is from here -
SysWoW64 is not included in 64-bit versions of WinPE, however it is possible to add limited SysWoW64 support in this project (LinuxReader is not working and FTK Imager only works with some sources). Please note that SysWoW64 is only supported when the following 64-bit source files are used -
The Cache Files script included in the Tools folder will add the SysWoW64 dependencies to the cache. Please note that if your source files are compiled from Option 3 in the Cache Files script then SysWoW64 support might not include the full registry support that is added when using Windows Installation media sources.
When using Windows Installation Media source files, if NO is selected during the build process and 64-bit source files are detected, then you will be prompted to add the SysWoW64 dependencies to the Cache.
The 5-Wow64 script (hosted on TheOven.org) was used as a base to identify SysWoW64 file and registry dependencies. Credits therefore go to everyone involved in the 5-Wow64.script (including JFX, Lancelot, 2aCD, ChrisR. Note from the script - "...All credits go to Microsoft for developing this Operative System and to everybody on the BootLand forums for helping on the debuggind and improvement of this plugin. yamingw setWow64 tool.").
Use image number 2 when using Windows installation media. The only time you should need to use image number 1 is when using boot.wim from the WAIK or ADK - which I consider to be more advanced usage.
If an existing cache is used, then the configuration file created when the cache was created will be read and the image number of boot.wim will be checked. If this is different to the image number selected in this option, then the user will be asked which image to use - either the image number from the configuration file, or the image number specified in this option.
In the majority of cases, image number 1 should be selected when using Windows installation media. The only time you might need to use a different image number is when using a Windows Server source. Windows 2008 R2 (SP1) and Windows 2012 R2 releases for example contain multiple images (in install.wim) - image number 1 is a Server Core Installation and doesn't contain some of the file dependencies required in MistyPE.
I would personally recommend using the INJECT method as it's faster and requires less free storage space. If the EXTRACT method is used then all of the files contained in boot.wim will be extracted, modified and repacked.
If the DEFAULT setting is used, then no settings will be changed and the keyboard layout from the existing source files will be used. There are a limited range of alternative Keyboard Layout's available in this script.
This setting is only used if the source file language cannot be verified by wimlib-imagex.
MistyPE is intended to be a light build of WinPE, aimed primarily at system deployment, backup, repair and restore. Some of the applications are relatively large in size and add significantly to the size of boot.wim - the file containing the WinPE operating system. FTK Imager (version 3.1.1.8) for example is 74 MB when unpacked.
MistyPE has an option to copy the majority of the Program files to an external directory so that they are not packed in to boot.wim. There are a number of advantages to this approach - the main one being the ability to update individual programs without having to rebuild the project. As an added advantage boot.wim will be smaller in size and less RAM is required to boot MistyPE.
If this option is selected, the programs will be copied to the \MistyPE.Project.Output\ISO.ROOT\ directory (this path is relative to WinBuilder.exe), and will be added to the root of the CD\DVD image if the Create ISO script is enabled. Alternatively, manually copy the Programs directory to the root of a USB drive.
To enable this option, select NO in option 9] Programs in boot.wim. Essential programs (file manager, WProtect.exe, etc) will still be copied to boot.wim. The Programs that will be copied to the \MistyPE.Project.Output\ISO.ROOT\ directory currently include -
These programs are self-contained and all dependencies are added to individual program directories - they should therefore work in other WinFE/WinPE builds based on the same Windows source files (e.g. processor architecture and build versions match).
If you chose not to add Programs to boot.wim then a menu option (Find Programs) will be added to the bblean menu...

...Selecting Find Programs will launch a batch file that will check the root of all mounted drives (the drive must be visible from WinPE) and depending on the settings used in the project, will either start LaunchBar (see here) or search for (and run) \Programs.x86\MistyPE.menu.cmd / \Programs.x64\MistyPE.menu.cmd.
The MistyPE.menu.cmd file will (if found) add menu entries for all of the programs listed above if they were included in the build - it will also add registry entries for some programs including 7-zip, Eraser, JkDefrag, Sumatra and Opera. Optionally, MistyPE.menu.cmd can be executed manually if you want to use a different folder path - or simply launch the executables using a file manager.
Use this option to set the size of the RAM Disk (in MB) - this is the amount of writable space on the SYSTEMDRIVE that will be available when WinPE is running.
This setting is ignored in WinPE 5.x if system RAM is greater than 1GB. It will only be used when RAM is less than (or equal to) 1GB.
Document date - 20th January 2018