
There are a number of different methods for creating a bootable USB stick, including -
The following is a walkthrough of the steps required for creating a bootable USB stick using the command-line DiskPart tool. The actions include wiping the disk before creating and formatting a new partition and making the partition active - as this could potentially result in data loss make sure that the correct disk is selected. DiskPart works by targeting an object (either a disk, volume or partition) - making it have "focus" (see here).
The drive will need to be manually selected. Use the command List disk to show all available disks -

It should be possible to identify your USB stick based on it's size or other attributes. In this walkthrough the "target" was identified as disk 1. Select disk 1 by entering the command sel disk 1 -

To double check the correct disk has been selected, use the command detail disk to display more detailed attributes -

Use the clean command to wipe the disk (a limited number of sectors will be erased - removing all partition information and effectively wiping the whole disk). Alternatively the command clean all could be used to zero the whole of the disk. As either of these commands will for all intents and purposes delete everything on the selected drive, make sure this is your USB stick and not your hard drive before proceeding! -

To create a primary partition using all available disk space, use the command create partition primary

The remaining tasks need to be carried out on the newly created partition. Use the command select part 1 to select the new partition -

Use the active command to make the partition bootable -

To (quick) format the selected partition with a FAT32 file system, with a volume label WinPE_USB, use command format fs=fat32 label=WinPE_USB quick. Where fs= selects the file system to be used (options are fat32, ntfs), label= is the volume label to assign to the drive, and quick completes a fast format -

To mount the new partition (to assign a drive letter) use the command assign -

Now copy the files and folder from %BaseDir%\MistyPE.Project.Output\ISO.ROOT\ to the USB stick.
The following files/folders should be present on the USB stick -
That's it.
Rufus (see here) is a relatively simple tool that can be used to create a bootable USB drive from an ISO file.
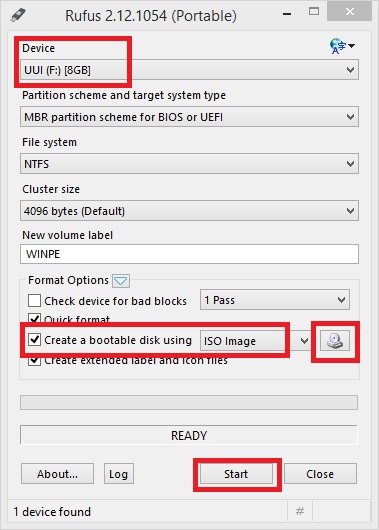
Start Rufus > select the target device, use the default settings > make sure that "Create a bootable disk using:" is selected > click on the disc icon next to "ISO Image" > browse to your WinPE.iso file > then click on start -

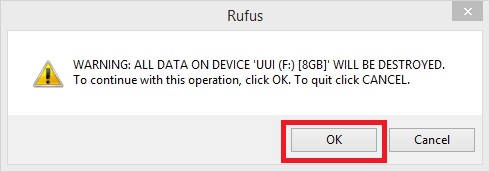
You will see a warning -

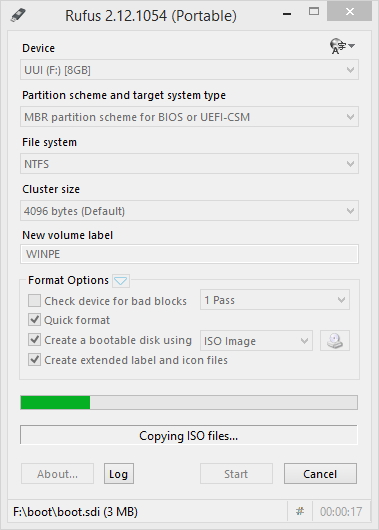
That's pretty much it - Rufus will make the USB stick bootable and will unpack the contents of the ISO files selected earlier.

As an alternative to using DiskPart or Rufus, try one of the following -
Document date - 20th January 2018