This page does not apply to Windows 2000/XP/2003 as Digital Driver Signing policy is not enforced on Windows NT 5.* systems.
The instructions in this page document installing SVBus in a live/online system. DISM can be used to install the driver in an offline system (see here).
Microsoft introduced a Driver Signing Policy in Windows Vista and later versions of Windows (see here). Unsigned drivers, including the SVBus driver, cannot be installed in 64-bit versions of Windows unless certain settings are changed. The requirement for digitally signed drivers was introduced in 64-bit Windows as a security measure. Unfortunately the costs of obtaining a digital certificate can be prohibitive and older versions of the SVBus driver do not have a digital signature.
SVBus 1.3 and instx64.exe/instx86.exe
Based on information from the developer, SVBus version 1.3 is digitally signed using a leaked digital certificate.
"....the driver files svbus.cat, svbusx86.sys and svbusx64.sys are now fully signed
We use a leaked Atheros certificate by Dell to sign all driver files and make the x64 driver load without the need to disable Driver Signature Enforcement on Windows Vista x64 and later. We do not have to enable TESTSIGNING or DISABLE_INTEGRITY_CHECKS like shown in some tutorials of the included ReadMe.txt file.
SVBus driver installer updated
The driver installer can now update the SVBus driver on a running system. At the installer start the system date is set to 03/31/2013. This way we can install the SVBus driver with enabled Driver Signature Enforcement based on the leaked Atheros certificate. After installation is finished the original system date prior to installation is restored...."
Install SVBus by running instx64.exe/instx86.exe in a command prompt with elevated privileges (run as administrator).
Unsigned Drivers
There are various documented methods for installing drivers without a valid digital signature, however the only reliable method during testing involved completing the following steps BEFORE installing the SVBus Driver -
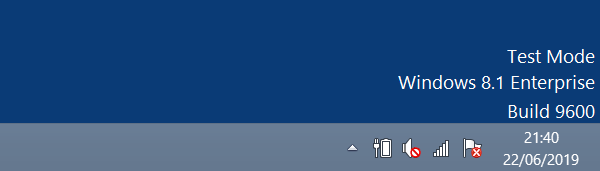
Edit the system BCD store and set TESTSIGNING ON. After applying this setting the system must be rebooted to apply the change. Following the reboot a Test Mode watermark will appear on the desktop.
After checking the Test Mode setting was applied correctly in step 1 > reboot the PC and press the F8 key to enter the Advanced Boot Options menu > select Disable Driver Signature Enforcement. Tip - pressing the F8 key at the right time can be difficult - to automatically display the Advanced Boot Options menu at start-up, edit the BCD store and set ADVANCEDOPTIONS YES -
Install the SVBus driver following the instructions in the Add Hardware Wizard section of this guide.
If the BCD store was modified in step 2 with the ADVANCEDOPTIONS YES option added, disable this option by running the bcdedit command with ADVANCEDOPTIONS NO - the Advanced Boot Options > Disable Driver Signature Enforcement is only required when installing the driver.
NOTE - Test Mode (BCD > TESTSIGNING ON) MUST be left enabled in order for unsigned SVBus drivers to be loaded.
The latest version of SVBus (1.3) has a signed driver and does not require that TESTSIGNING is enabled, however Advanced Boot Options > Disable Driver Signature Enforcement is still required when installing the driver via the Add Hardware Wizard unless the system date is changed manually.
Offline Installation
The SVBus driver can be installed to an offline system using the DISM tool. E.g. -