
The instructions in this page can be used to install the SVBus driver using the Add Hardware Wizard - use to install SVBus to a running Windows NT 6.* or 10.* Host Operating System. A possible usage scenario might be preparing an existing VHD Native Boot setup for RAM booting.
NOTE - the screenshots in this section are from a Windows 8.1 Update system - the Add Harware Wizard may differ on other versions of Windows.
SVBus version 1.3 is digitally signed. If using an older versions of SVBus the following steps need to be taken before attempting to install the SVBus driver on a 64-bit Operating System > ensure that TESTSIGNING is enabled and select the F8 Advanced Options Disable Driver Signature Enforcement boot menu option (see here).
SVBus version 1.3 uses a leaked Atheros certificate. In order to install the driver on a live system, manually set the system date to 03/31/2023 before running the Add Hardware Wizard - the date can be reset afterwards. Alternatively select the F8 Advanced Options Disable Driver Signature Enforcement boot menu option when loading Windows (see here).
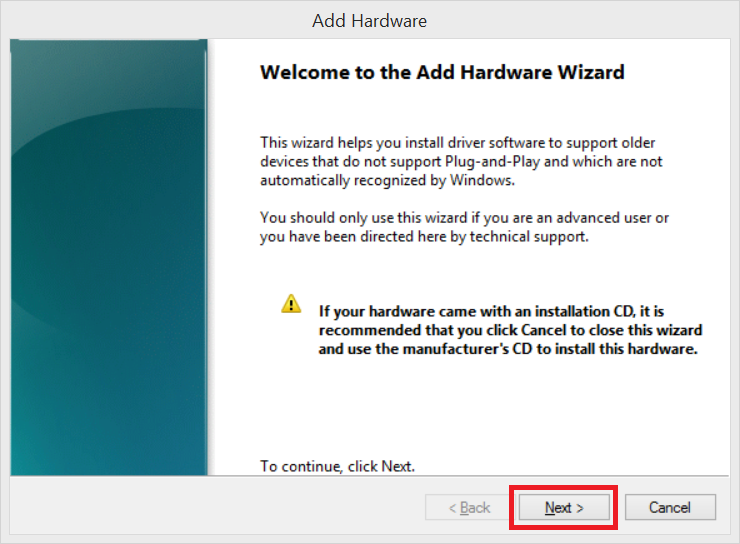
Open the Add Hardware Wizard - open a run dialog and enter hdwwiz, then click on the OK button -
Welcome to the Add Hardware Wizard - click on Next -
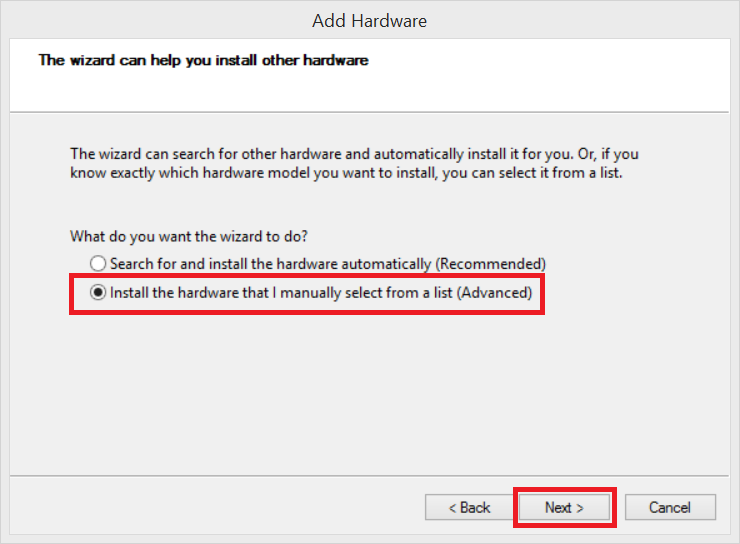
Select Install the hardware that I manually select from a list (Advanced), then click on Next -
Select Storage controllers from the list, then click on Next -

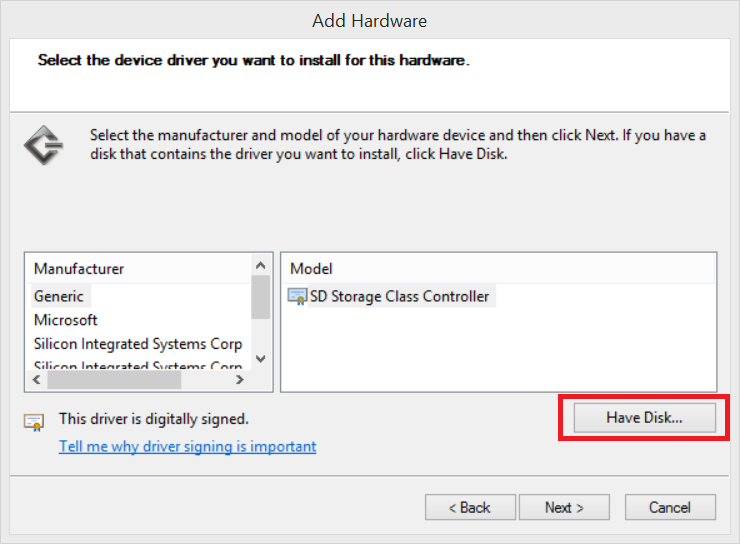
When prompted to Select the device driver you want to install for this hardware, select Have Disk... -
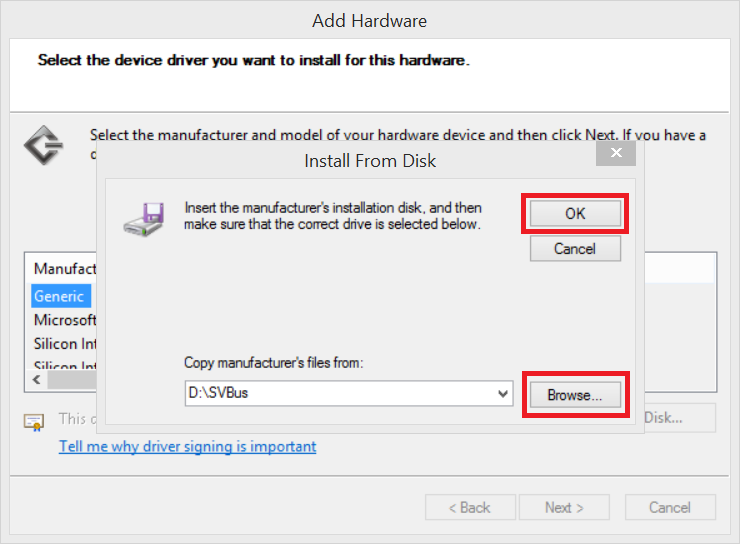
Install from Disk > Browse... (and browse to svbus.inf) > OK -
The SVBus Virtual SCSI Host Adapter should be displayed in the Model area > Next > -

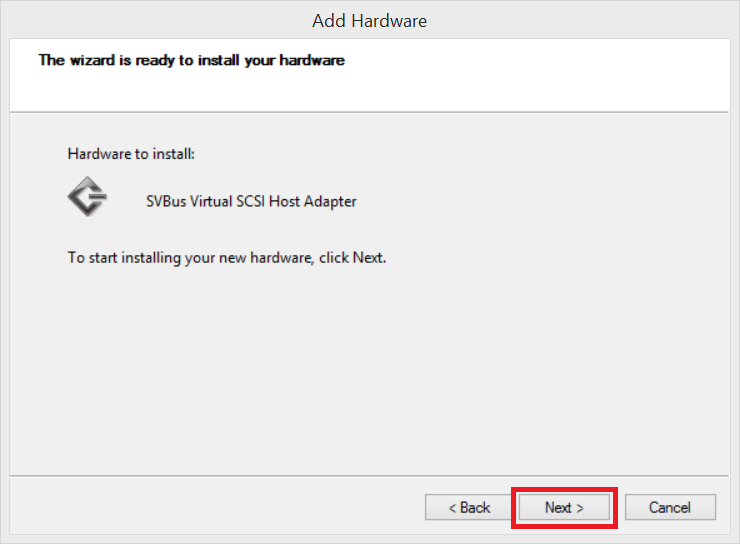
Hardware to install: - SVBus Virtual SCSI Host Adapter should be displayed > Next > -
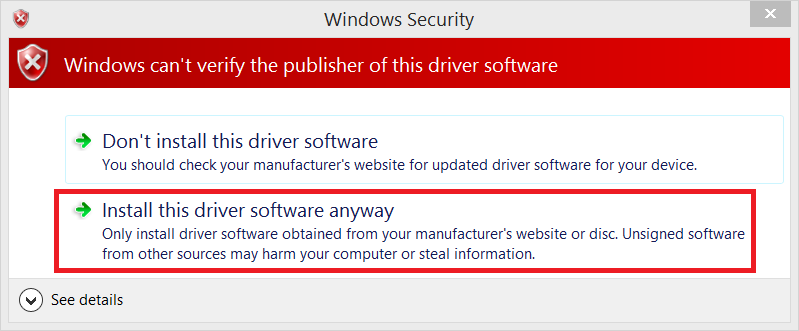
A warning will be displayed as the SVBus driver is unsigned. Select Install this software anyway -
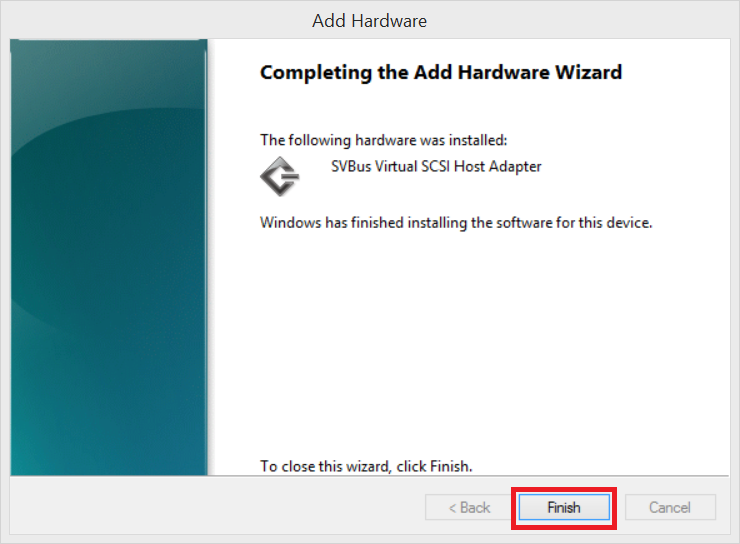
Finish -
Document date - 12th April 2023