A live internet connection is required for this method - offline installations are not covered. Additional requirements include -
ubuntu (16.04) set up following the instructions here (Netinstall).
iSCSI Target (covered elsewhere in this guide).
System Setup
The following hardware and settings were used on the test system -
iSCSI Target - Kernsafe iStorage Server (see here).
iqn.target - iSCSI Qualified Name (IQN) of the iSCSI Target.
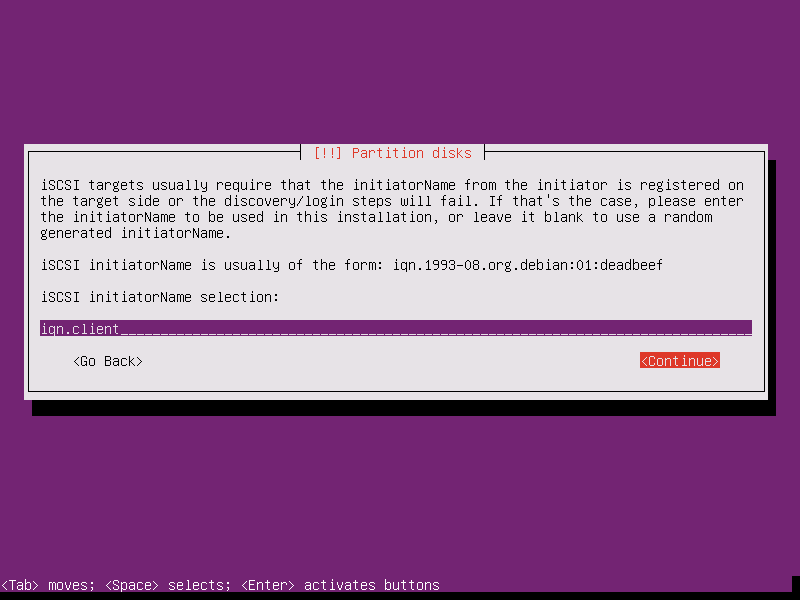
iqn.client - iSCSI Qualified Name (IQN) of the iSCSI Initiator (the client system).
Client System - Thinkpad X61
192.168.1.1 - IP address of the Tiny PXE Server system.
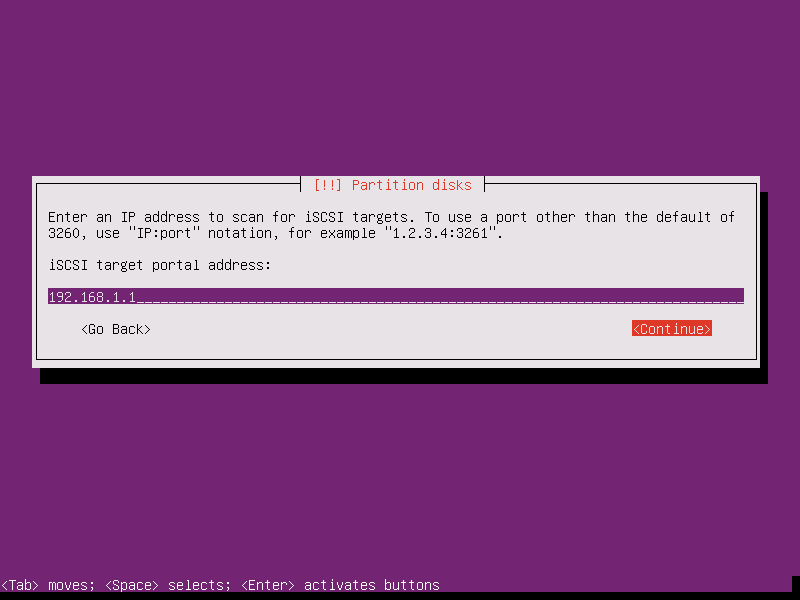
192.168.1.1 - IP address of the iSCSI Target.
NOTE - A VMWare Virtual Machine was also used for the purpose of capturing the screenshots used in this page.
Start
PXE boot the Client System and work through the Netinstall GUI screens. The majority of the screens are self explanatory - the instructions below focus on attaching and partitioning the iSCSI Target.
Attach iSCSI Target
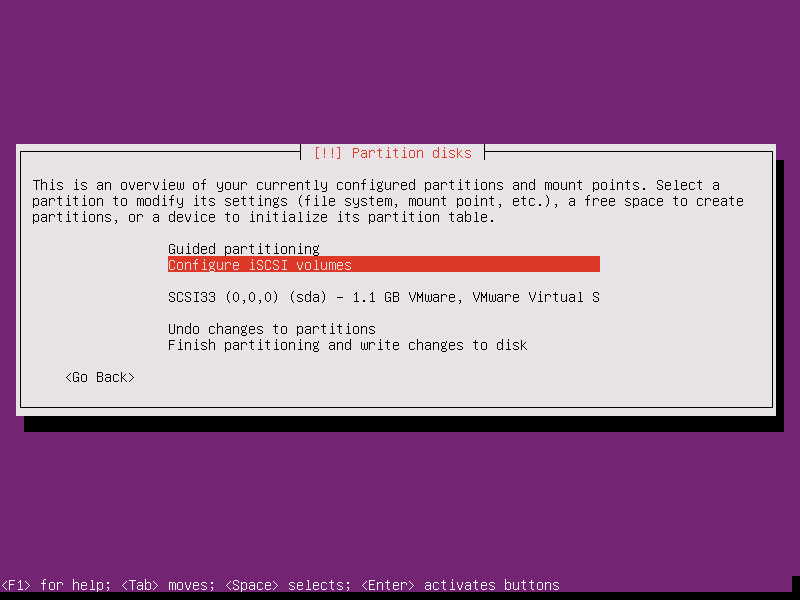
When you reach the [!!] Partition disks section, select the Manual option and press [Enter] -
Select the Configure iSCSI volumes option and press [Enter] -
Enter an initiator name (e.g. iqn.client) > highlight <Continue> and press [Enter] -
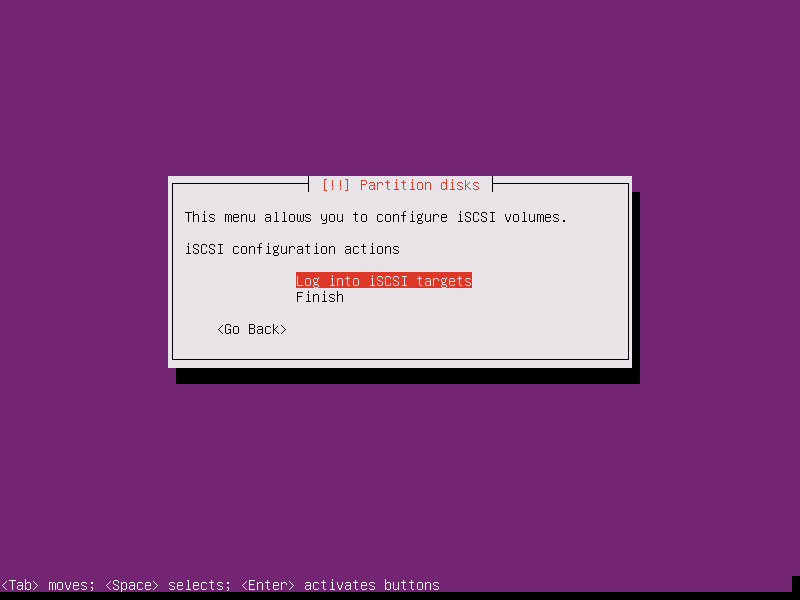
Select the Log into iSCSI targets option and press [Enter] -
Enter the IP address of the iSCSI Target system (e.g. 192.168.1.1) and press [Enter] -
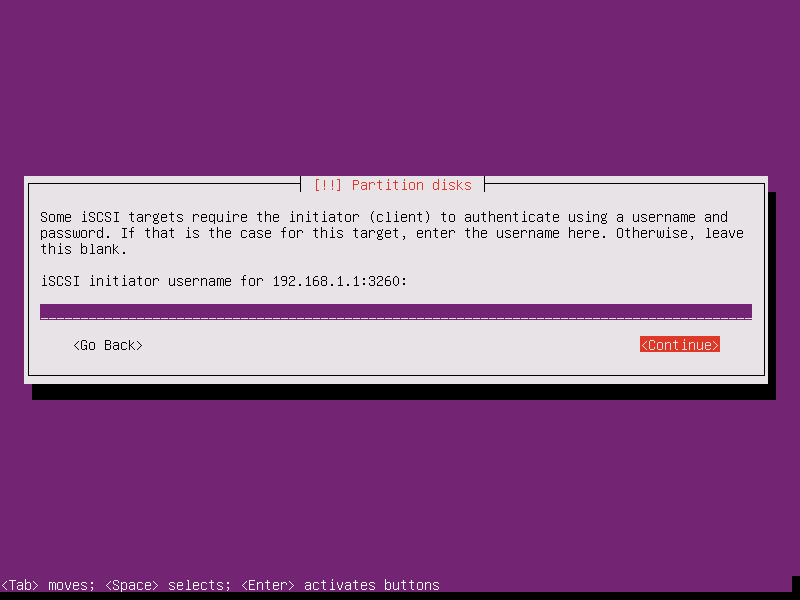
Enter a username if required for logging in to the iSCSI Target > highlight <Continue> and press [Enter] -
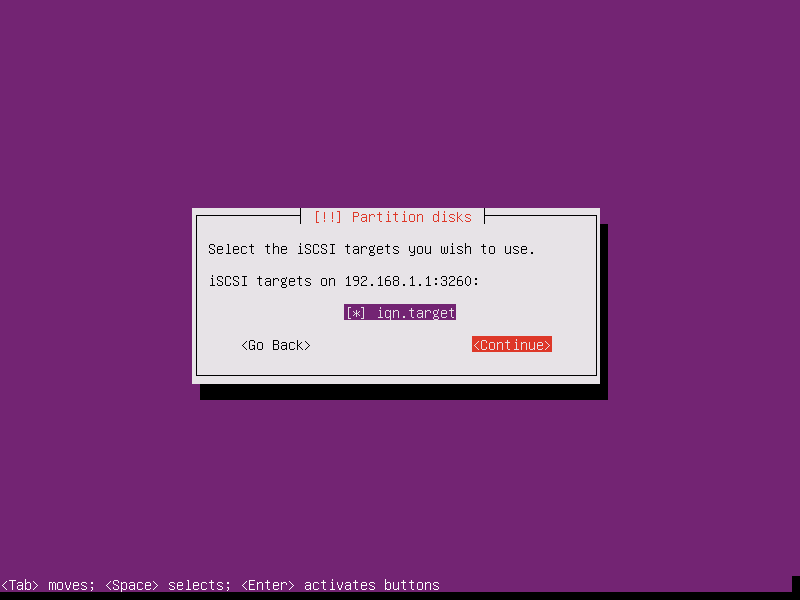
Highlight the iSCSI Target > press [Space] to select > highlight <Continue> and press [Enter] -
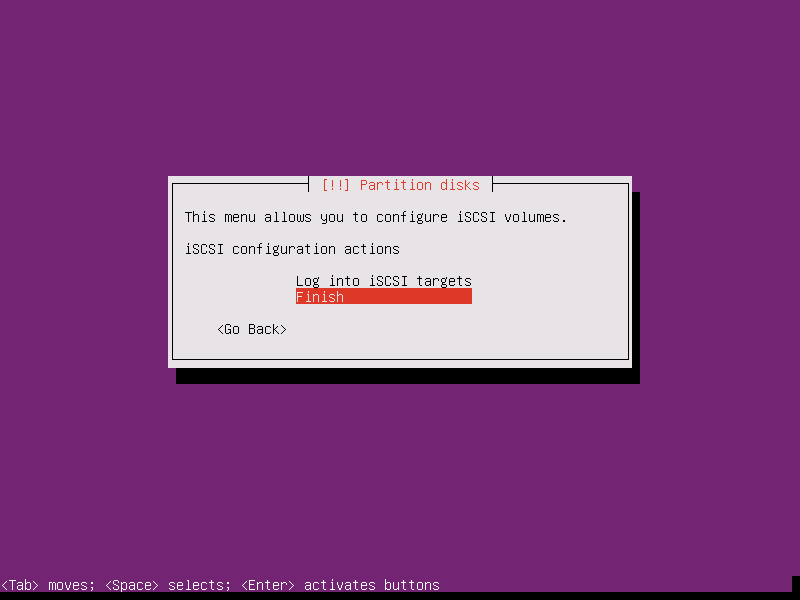
Select Finish and press [Enter] -
Partition iSCSI Target
After attaching your iSCSI Target, select it from the list of available devices. In the screenshot below the device is listed as sdb. Highlight the iSCSI device and press [Enter] -
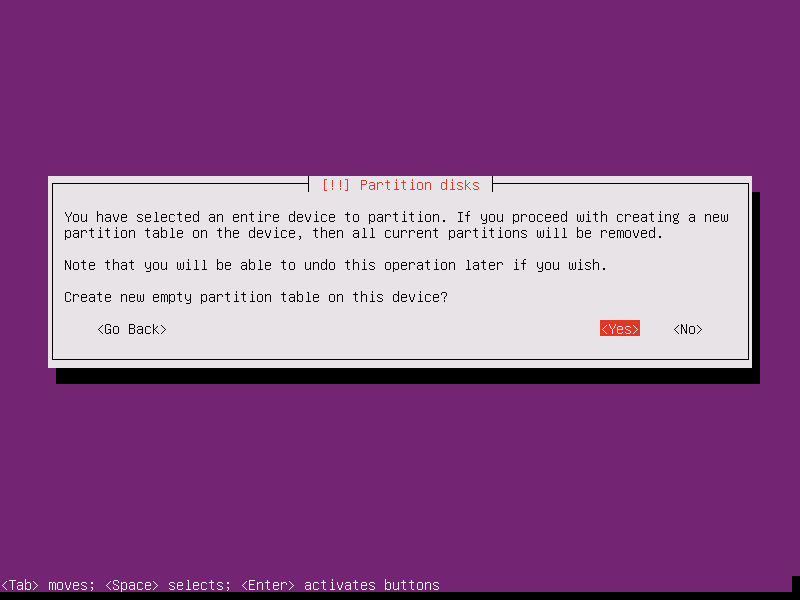
If the iSCSI Target is a RAW image file, a prompt to Create new empty partition table... will be displayed > highlight <Yes> and press [Enter] -
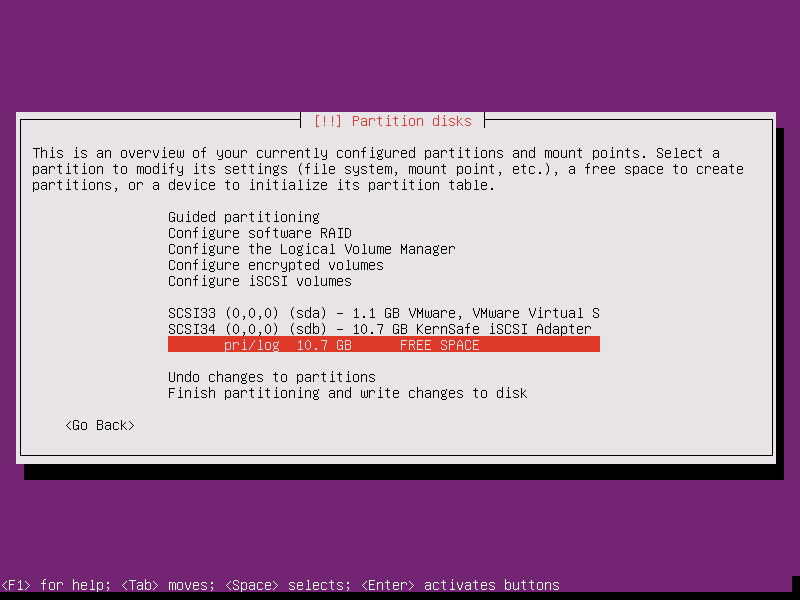
Highlight the FREE SPACE created after executing the preceding step and press [Enter] -
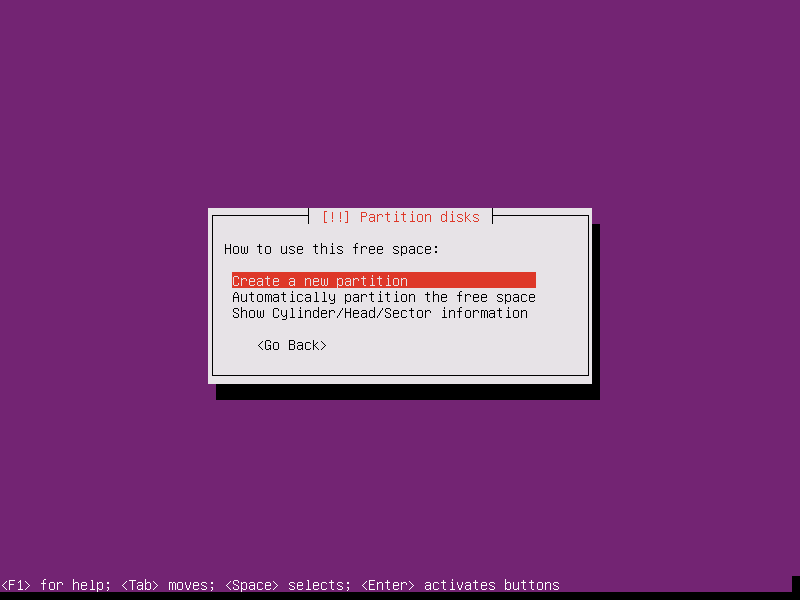
Select an option to partition the FREE SPACE and press [Enter] -
Assuming that the Create a new partition option was selected in the preceding step, enter a size for the new partition (it will default to the whole disk) > highlight <Continue> and press [Enter] -
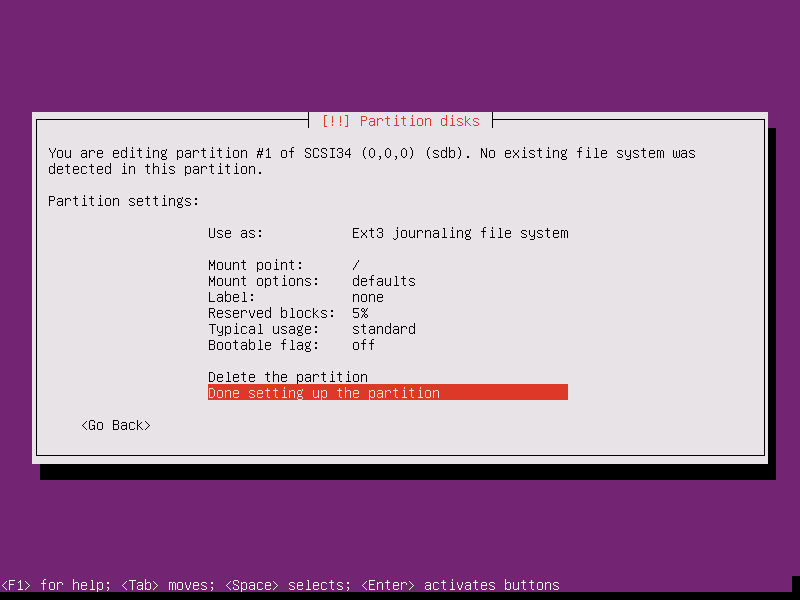
Chose either a Primary or Logical partition type and press [Enter] -
Select option Done setting up the partition and press [Enter] -
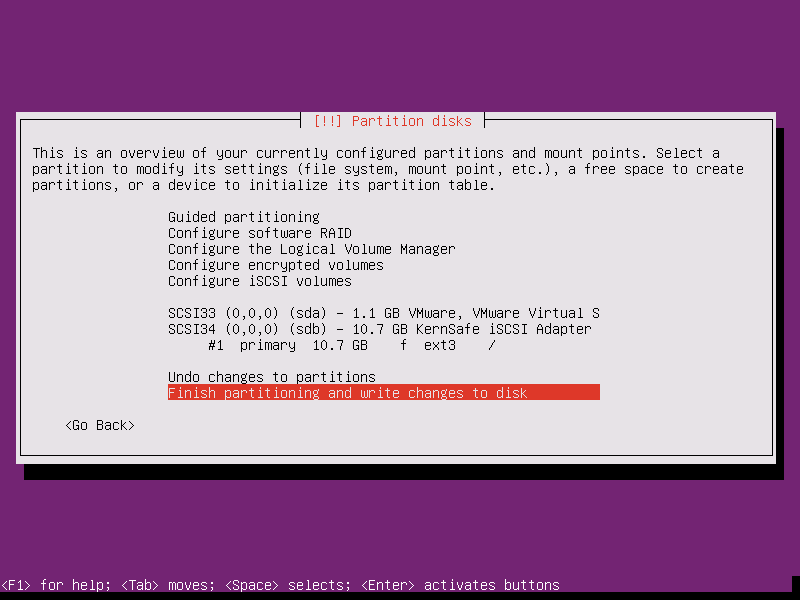
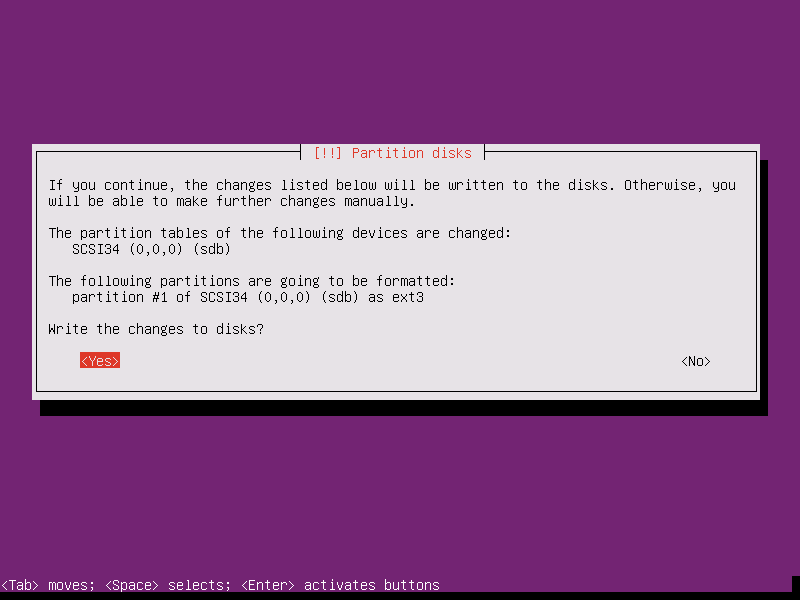
Select option Finish partitioning and write changes to disk and press [Enter] -
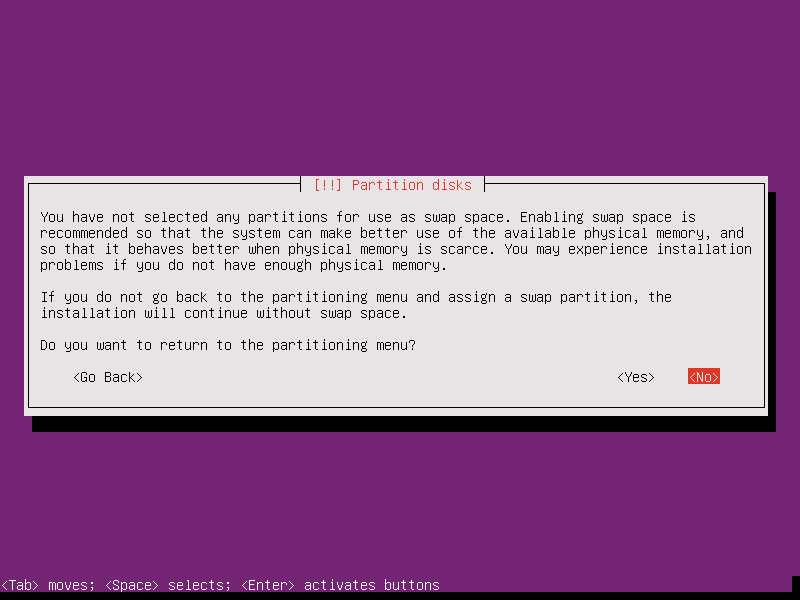
Ignore the Swap Space warning > highlight <No> and press [Enter] -
Highlight <Yes> and press [Enter] to write the changes to the disk -
Continue to work through the Netinstall GUI screens.
Install Grub
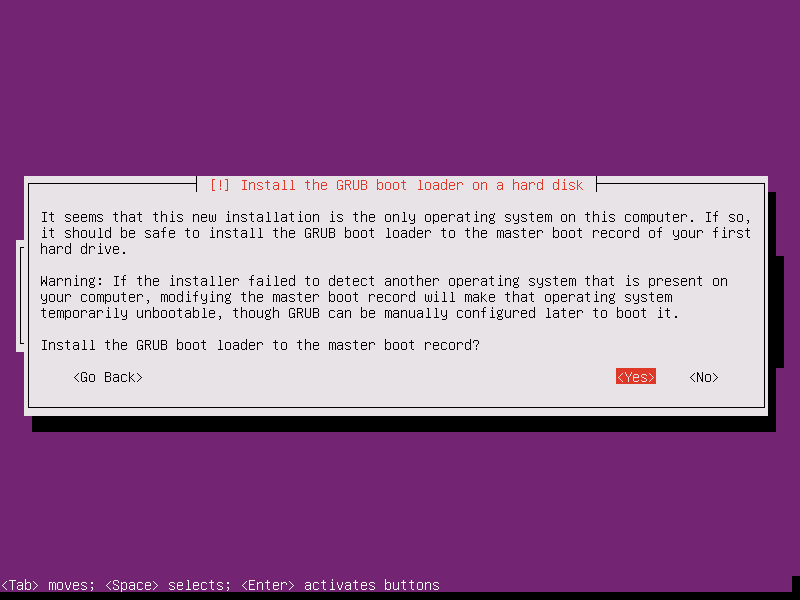
On reaching the [!] Install the GRUB boot loader on a hard disk screen, when prompted to Install the GRUB boot loader to the master boot record? > highlight <Yes> and press [Enter] -
Ensure that the iSCSI Target is selected and press [Enter] -
Boot
Assuming all of the steps above have been completed, shutdown the Client System when prompted > add the required settings for your Network Bootstrap Program...
iPXE menus are essentially scripts. It's also possible to specify a simple script to boot the iSCSI Target using the altfilename option in config.ini. For example, create a script in the TFTP root directory C:\pxesrv\files\ubuntu.iscsi.txt > add altfilename=ubuntu.iscsi.txt to config.ini. NOTE - remember to change any references to ${dhcp-server} to ${next-server} if using ProxyDHCP.
Sample iPXE script ubuntu.iscsi.txt -
iSCSI URI Syntax
The format for iSCSI URI's is - iscsi:[servername]:[protocol]:[port]:[LUN]:[targetname]
Where -
servername - is the IP address or DNS name of the iSCSI Target. In iPXE scripts, environment variables including ${next-server} or ${dhcp-server} can be used.
protocol - this field can be left blank. The protocol used for iSCSI is TCP.
port - is the port used for connections to the iSCSI Target. The default port for iSCSI is 3260 - this field can be left blank if the default port is in use for incoming connections to the iSCSI Target software.
LUN - leave blank and use default (0). The LUN format seems unnecessarily complex - see here and here.
targetname - unique IQN of the Target being booted/attached.
If default settings are used for the protocol, port and LUN fields then these fields can be left blank. The following entries for example will all function (assuming the Target IP address is 192.168.1.1 and that this IP address is correctly set as the dhcp-server variable when iPXE is booted) -