This page has been adapted from Erwan Labalec's blog post - Having fun with StarWind Virtual SAN Free and differencing virtual disks.
A wide range of virtual disk formats exist, some of which might not be supported by your preferred iSCSI Target. This page covers a potential workaround for unsupported formats - please note that the Target must support the use of Physical Disk devices. Differencing type Virtual Hard Disks are used as an example below - the majority of Windows iSCSI Targets covered in this article do not natively support VHD Differencing Disks.
Native support for Virtual Hard Disks was introduced in Windows 7 and is integrated within the Windows Disk Manager. Consequently a VHD type disk mounted in Windows 7 (or newer versions of Windows) using the Disk Management console or DiskPart can be accessed as a Physical Disk device using iSCSI Targets - including iSCSI Console.
A similar approach can be used to access other virtual disk image formats if a driver provides Windows Disk Management integration when the image is mounted. Third party drivers including Arsenal Image Mounter may support your preferred disk image format -
DiskPart is used in the walkthrough below - DiskPart command syntax is not covered and a knowledge of the program is assumed. vMount can be used as an alternative.
NOTE - in the walkthrough below an existing .vhd file (C:\parent.vhd) containing a sysprepped Windows 10 Operating System is used as a base image for the differencing disk created in Step 1.
This page contains the following sections -
Create a differencing disk (C:\child.vhd) from an existing VHD (C:\parent.vhd) using the command -
create vdisk file=C:\child.vhd parent=C:\parent.vhd
vMount equivalant - vmount-win64 createchildvhd C:\child.vhd C:\parent.vhd
Attach VHD file created in the preceding step ( attach vdisk ) -
vMount equivalant - vmount-win64 attachvhd C:\child.vhd
If using iSCSI Console then set the disk as Offline using the command offline disk -
vMount equivalant - vmount-win64 offline 2
Running the command detail disk will display disk information (note that "Status:" is now set as "Offline (Policy)" -
Check disk status using the command list disk -
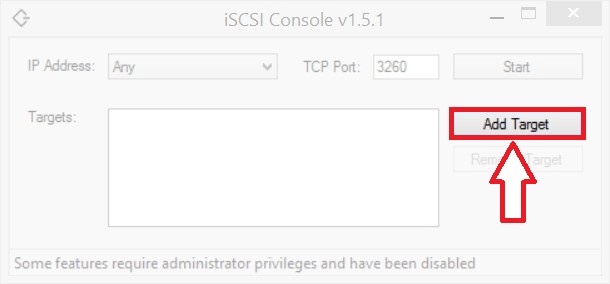
After mounting your virtual disk you will need to select it as your iSCSI Target device. iSCSI Console is used in the screenshots below - ensure that you run it with Administrator privileges as Physical Disks cannot be used as a Device without elevated privileges.
Select Add Target in the main console -
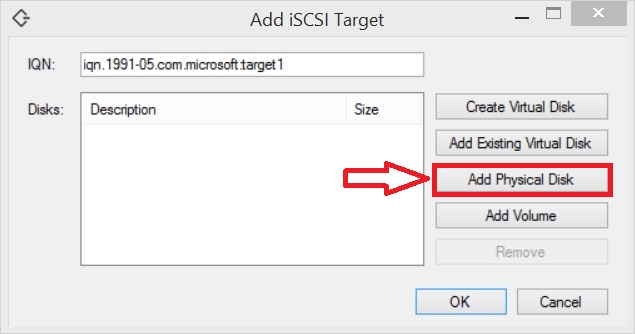
Select Add Physical Disk -
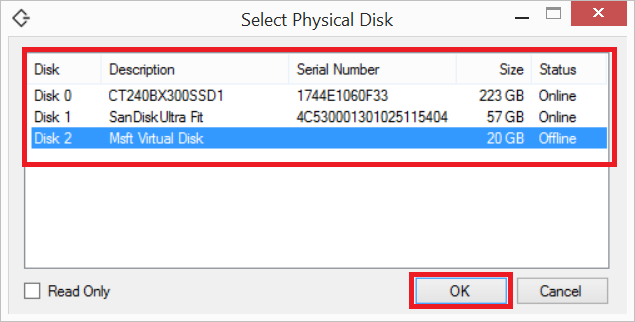
In the Select Physical Disk window, select the mounted virtual disk from the list (Disk 2 in the screenshot below) > OK -
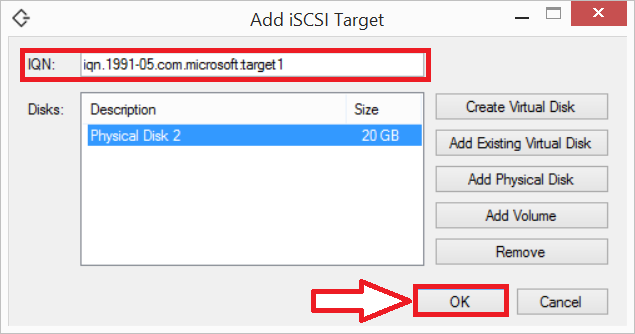
Select OK (after editing the IQN field as required) -
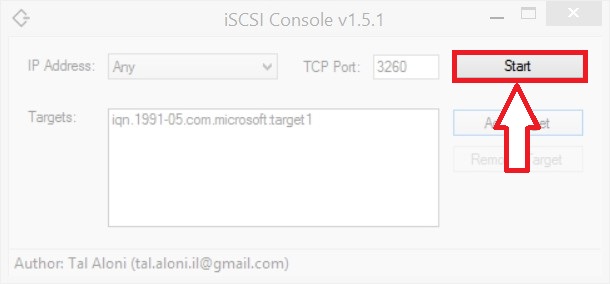
Click on the Start button -
As a sysprepped image containing a Windows Installation was used as a base (parent), the following process can be used to boot Windows from the device created in Step 2 -
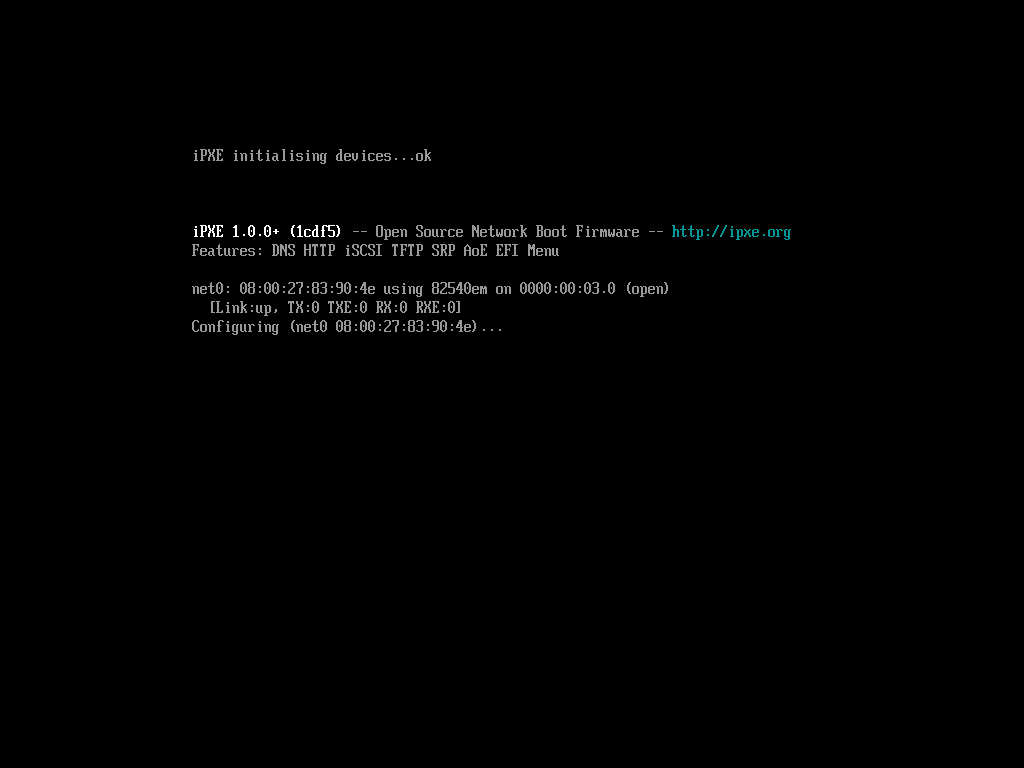
iPXE boot screen -
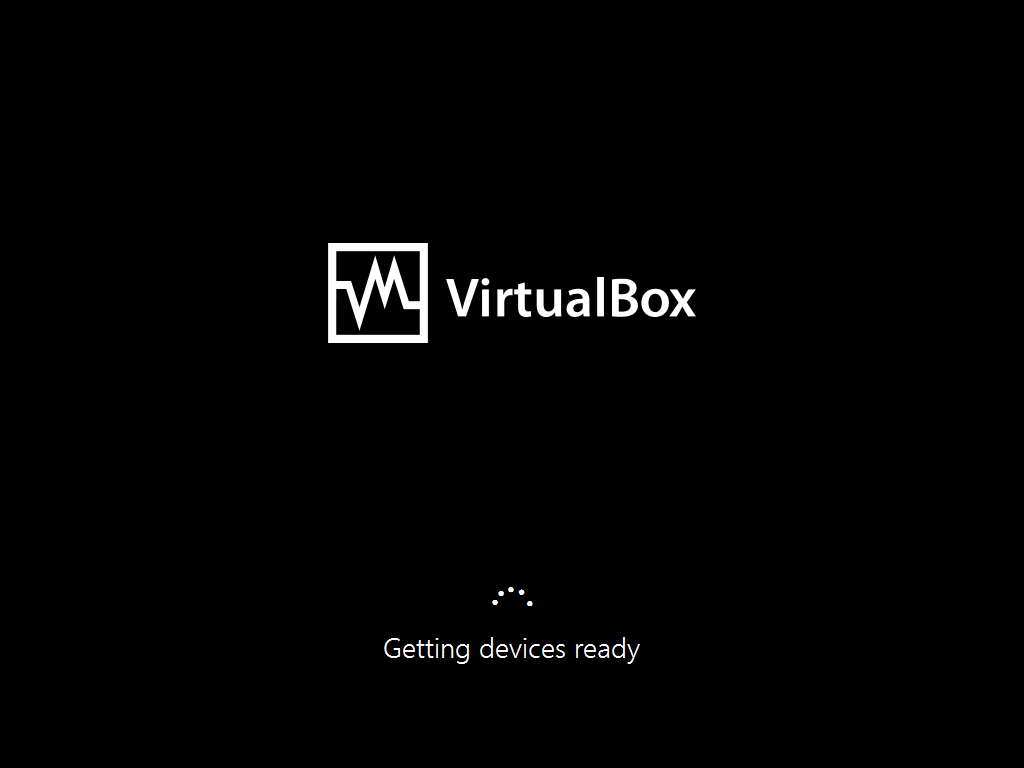
Screenshots following the SANBOOT command using a Sysprepped disk (image) as the Target device -

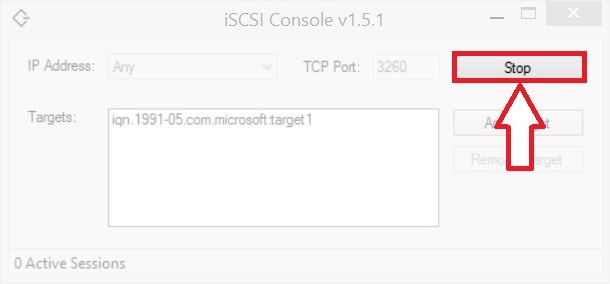
Stop the Target -
Start DiskPart and select the disk - e.g. select vdisk file=C:\child.vhd -
Detach the VHD file selected in the preceding step ( detach vdisk ) -
vMount equivalant - vmount-win64 detachvhd C:\child.vhd (specifying file)
or - vmount-win64 detachvhd 2 (specifying disk number)
A practical application for using more than one Differencing Disk would be multiple systems booting from the same base image - for example diskless clients on the same network. The same Target device cannot be SAN booted by more than one Initiator system at the same time - each Initiator System will need to be booted from a different Target Device. Cloning a Target device with Windows already installed is likely to result in conflicts as Security ID and computer names will be identical.
Using a Generalized Sysprepped master image as a base will ensure that there are no conflicts with computer names or other identifiers, as the Generalize option will remove all unique system information (including security ID (SID)) from the Windows installation in the base image (C:\parent.vhd in the examples above). Assuming a Differencing disk has been created from a Sysprepped base image, when SAN booting the differencing disk, unique system information will be configued during the installation process.
System 1
System 2
NOTE - iPXE scripting can be used to automate the process, for example using the Initiator Systems MAC Address as an identifier to connect to a specified Target.
Any hard disk mounted on a Windows NT System must contain a unique disk signature in LBA Sector 0 at hex address 0x1B8. A disk signature is a 4 byte value and all disks connected to a Windows system must have a unique disk signature. If two disks contain the same signature, which is likely if a system has been cloned or more than one Differencing disk using the same Base image is used, then one of the disks will have this value edited to avoid a Disk Signature Collision. An edited disk signature may result in one of the disks no longer being bootable, as Disk Signatures may be specified in the Boot Configuration Data (BCD) store to locate Windows Operating System files. For more information about Disk Signature collision please see here.
To avoid disk signature collision if using multiple Differencing disks, ensure that a VHD file is set as Offline after it is mounted and before another Differencing disk using the same base is mounted - an Offline disk will not have its disk signature overwritten.
Document date - 14th June 2019