Page Contents
This article is based on observations on screen resolution and DPI scaling in WinPE. The test system included a Lenovo Thinkpad T470s with FHD resolution, with some tests also completed in VMWare Workstation Player. This system has UEFI firmware with CSM disabled. WinPE was based on boot.wim from Windows 21H2 installation media - modified using the Mini-WinFE project.
Screen resolution can be changed from a running WinPE booted on BIOS firmware. Changing the screen resolution on UEFI firmware is not so simple. Settings in unnatend.xml appear to be ignored and the screen resolution is fixed. Based on available information screen resolution appears to be set based on Graphics Output Protocal (GOP) mode. Once WinPE is booted, the resolution cannot be changed.
Investigating further, the screen resolution in WinPE is set to the resolution defined/set by the Windows Boot Manager. bcdedit.exe can be used to modify the BCD store and set the menu resolution that will subsequently by used in WinPE, however the graphicsresolution element does not support many options. Examples of resolutions that can be set using graphicsresolution include -
Attempting to use an unsupported resolution (unsupported by bcdedit.exe - not the hardware) resulted in the following output -
The highestmode option is also supported in bcdedit.exe. This option will enable boot applications to use the highest graphical mode detected by the firmware -
Exercise caution when using highestmode, as depending on the scale used by WinPE (see below), WinPE may be unusable on high resolution displays. As an example, running WinPE with 100% scaling on a Surface Pro with a screen size of 12.3" and maximum resolution of 2736 x 1824 was unreadable due to the content being hard to see and UI targets being difficult to select.
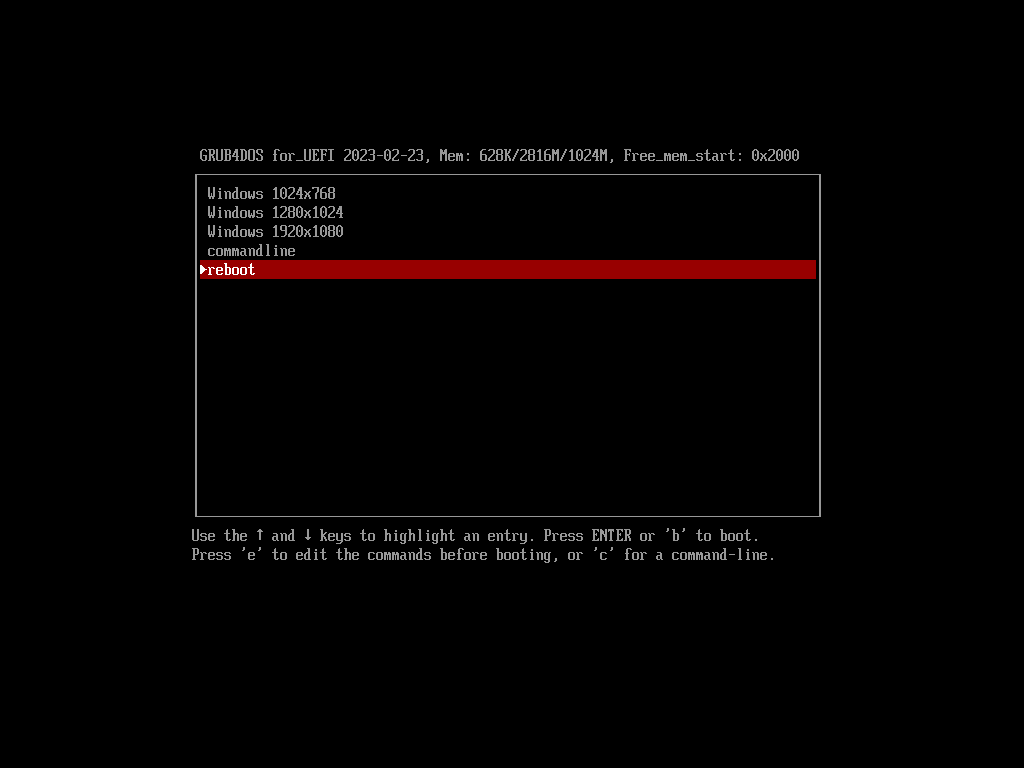
The GRUB4UEFI (aka Grub4dos-for_UEFI) boot manager can be used to set a wider range of screen resolutions before control is passed to the Windows Boot Manager. Setting the screen resolution in a GRUB4UEFI menu or at the commandline and then chainloading the Windows Boot Manager should keep the resolution set in GRUB4UEFI. NOTE that this may not work if the screen resolution is configured in the BCD store (e.g. graphicsresolution or highestmode is set) as these settings will override GRUB4UEFI.
To find supported resolutions, use the graphicsmode --info command on the GRUB4UEFI commandline. On the test system, the following resolutions are supported -
WinPE does not support resolutions lower than 768 vertical lines. This limits supported resolutions on the T470s test system to the following -
GRUB4UEFI configuration file (menu.lst) menu entries. Each entry uses the graphicsmode command to set a supported screen resolution prior to chainloading the Windows boot manager (/efi/microsoft/boot/bootmgfw.efi) -
The following screenshot was captured on a virtual machine, and shows the menu generated from the GRUB4UEFI configuration file (menu.lst) above -
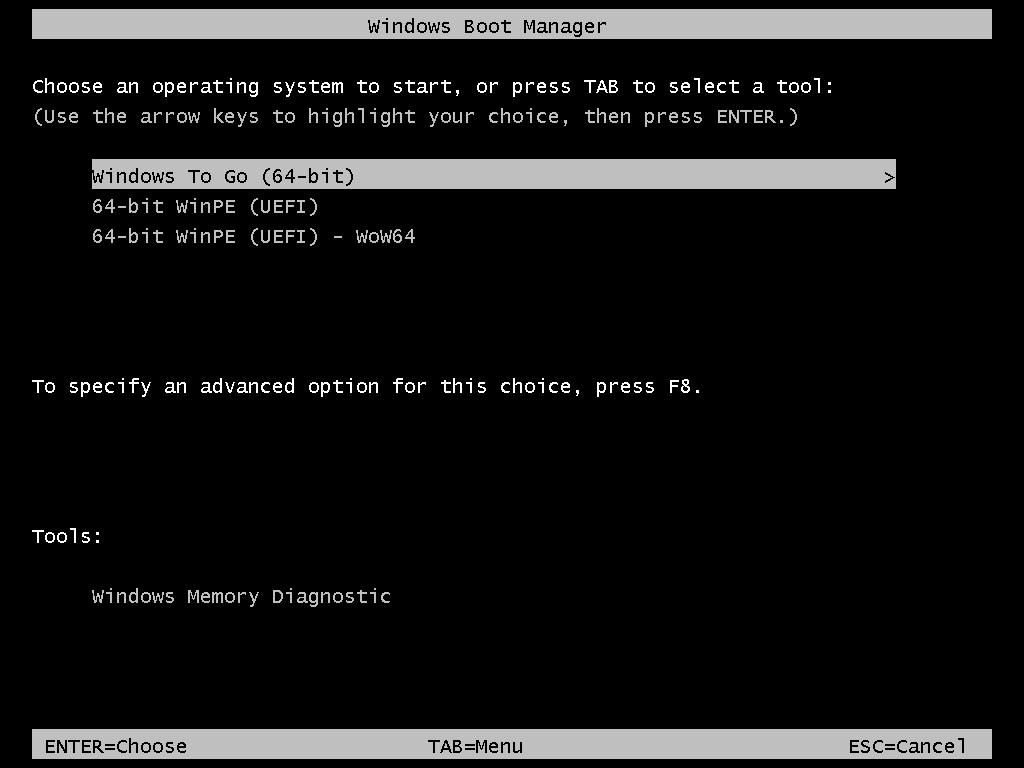
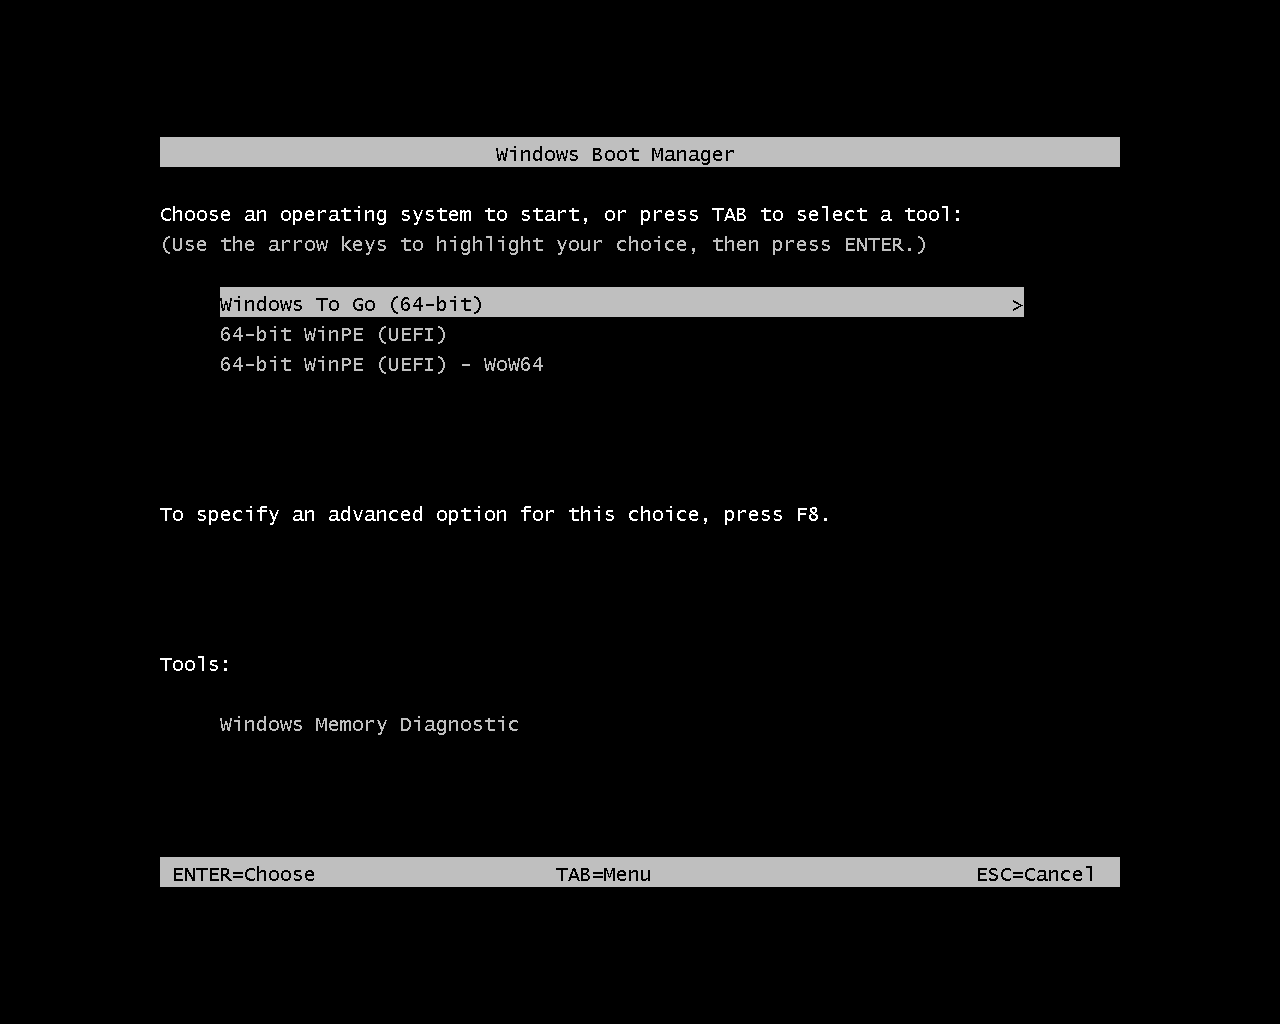
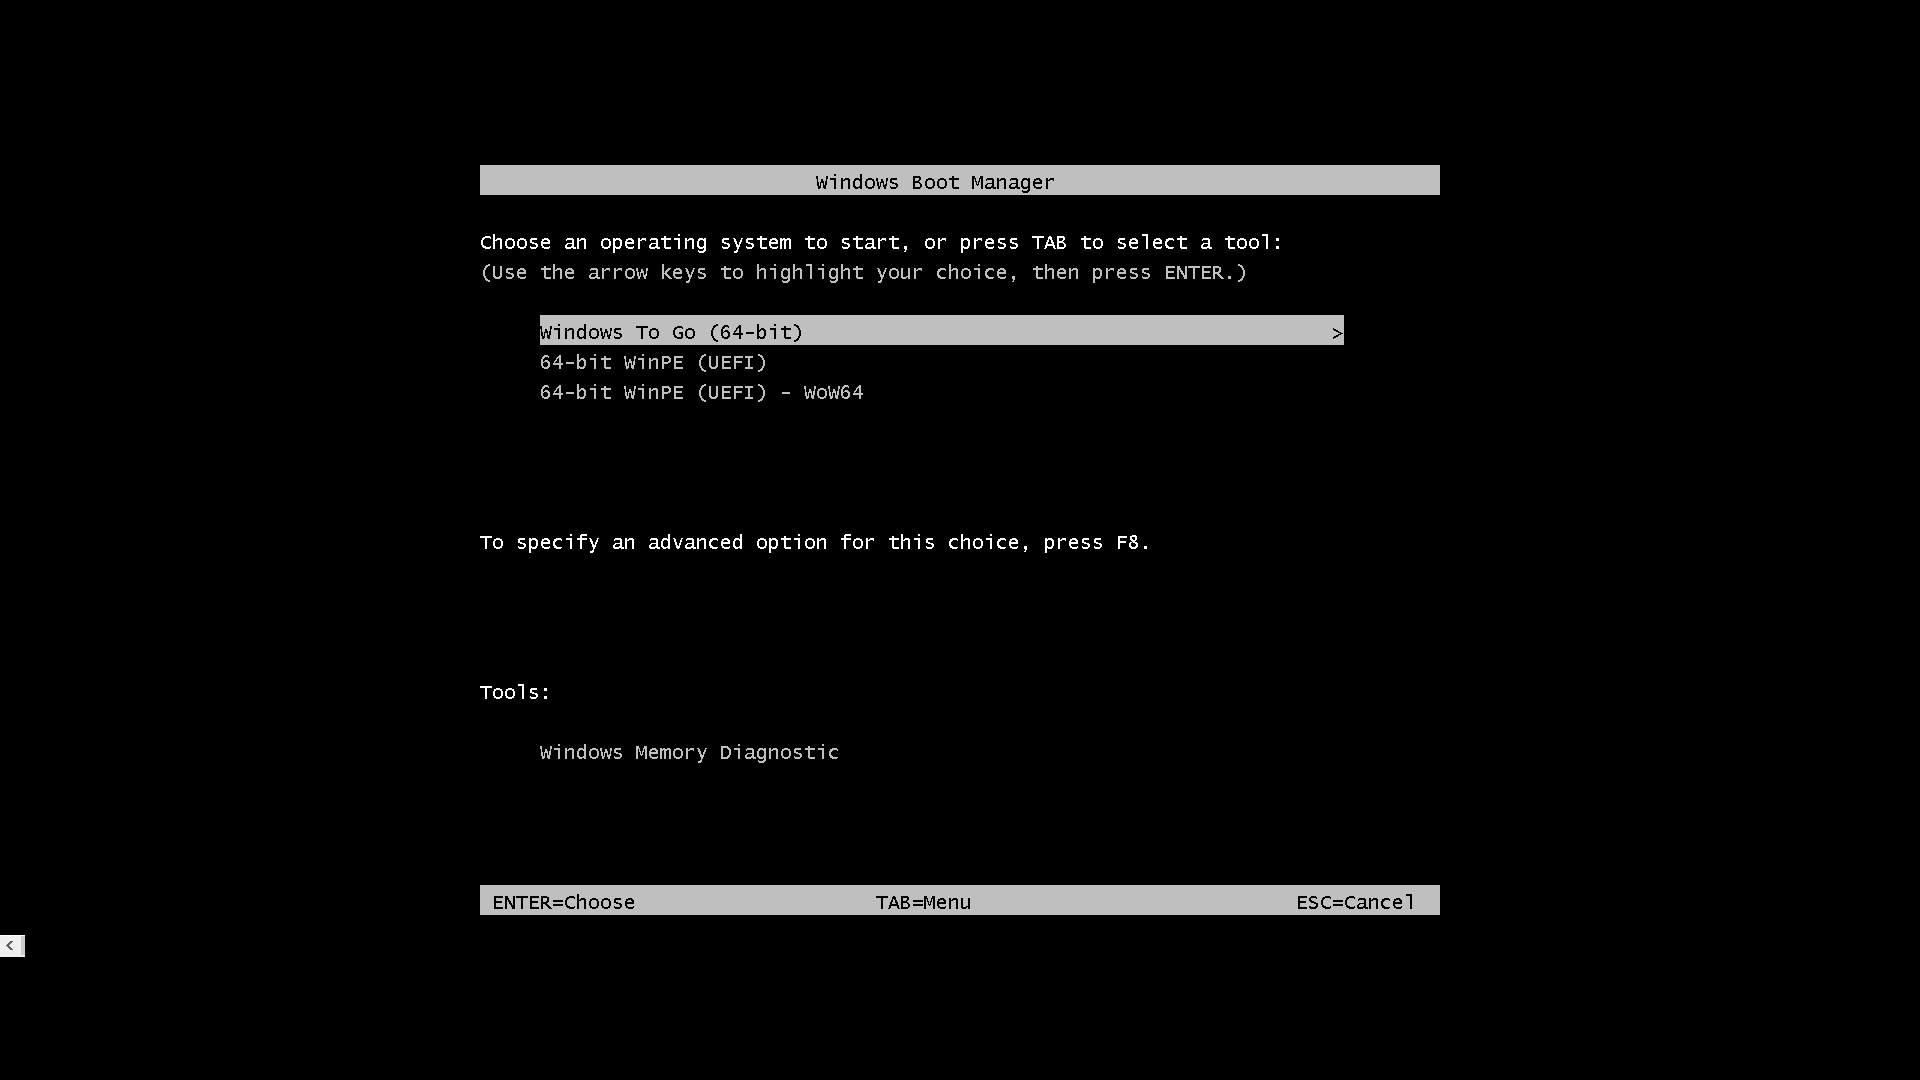
Screenshots of the windows boot menu and running WinPE after selecting the corresponding option in the GRUB4UEFI boot menu (click on the thumbnail for the full image) -
 |
 |
 |
 |
 |
 |
| Windows 1024x768 | Windows 1280x1024 | Windows 1980x1080 |
Overlay of the Windows boot menus for each corresponding screen resolution set/booted from the GRUB4UEFI menu -

Overlay of WinPE for each corresponding screen resolution set/booted from the GRUB4UEFI menu -
Contents -
The previous section covered setting the screen resolution. This section covers changing the DPI scale used in WinPE. By default WinPE versions 4/5.x/10.x/11.x will automatically set a scaling level based on a combination of the physical panel size and screen resolution. The following table has been copied from a Microsoft Windows Hardware Developer webpage (see here) and indicates scales used on several different panel sizes running in FHD resolution -
| Display/screen size | Resolution | Resolution (pixels) | Scaling level |
|---|---|---|---|
| 10.6" | FHD | 1920x1080 | 150% | 15.4" | FHD | 1920x1080 | 125% | 17" | FHD | 1920x1080 | 125% |
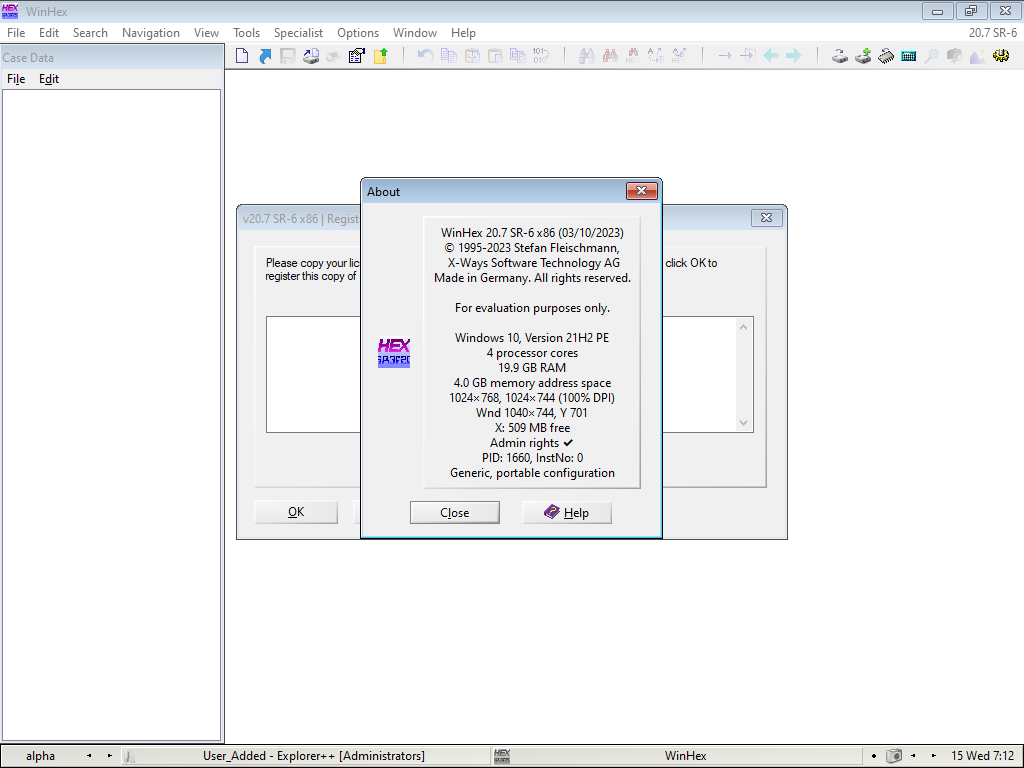
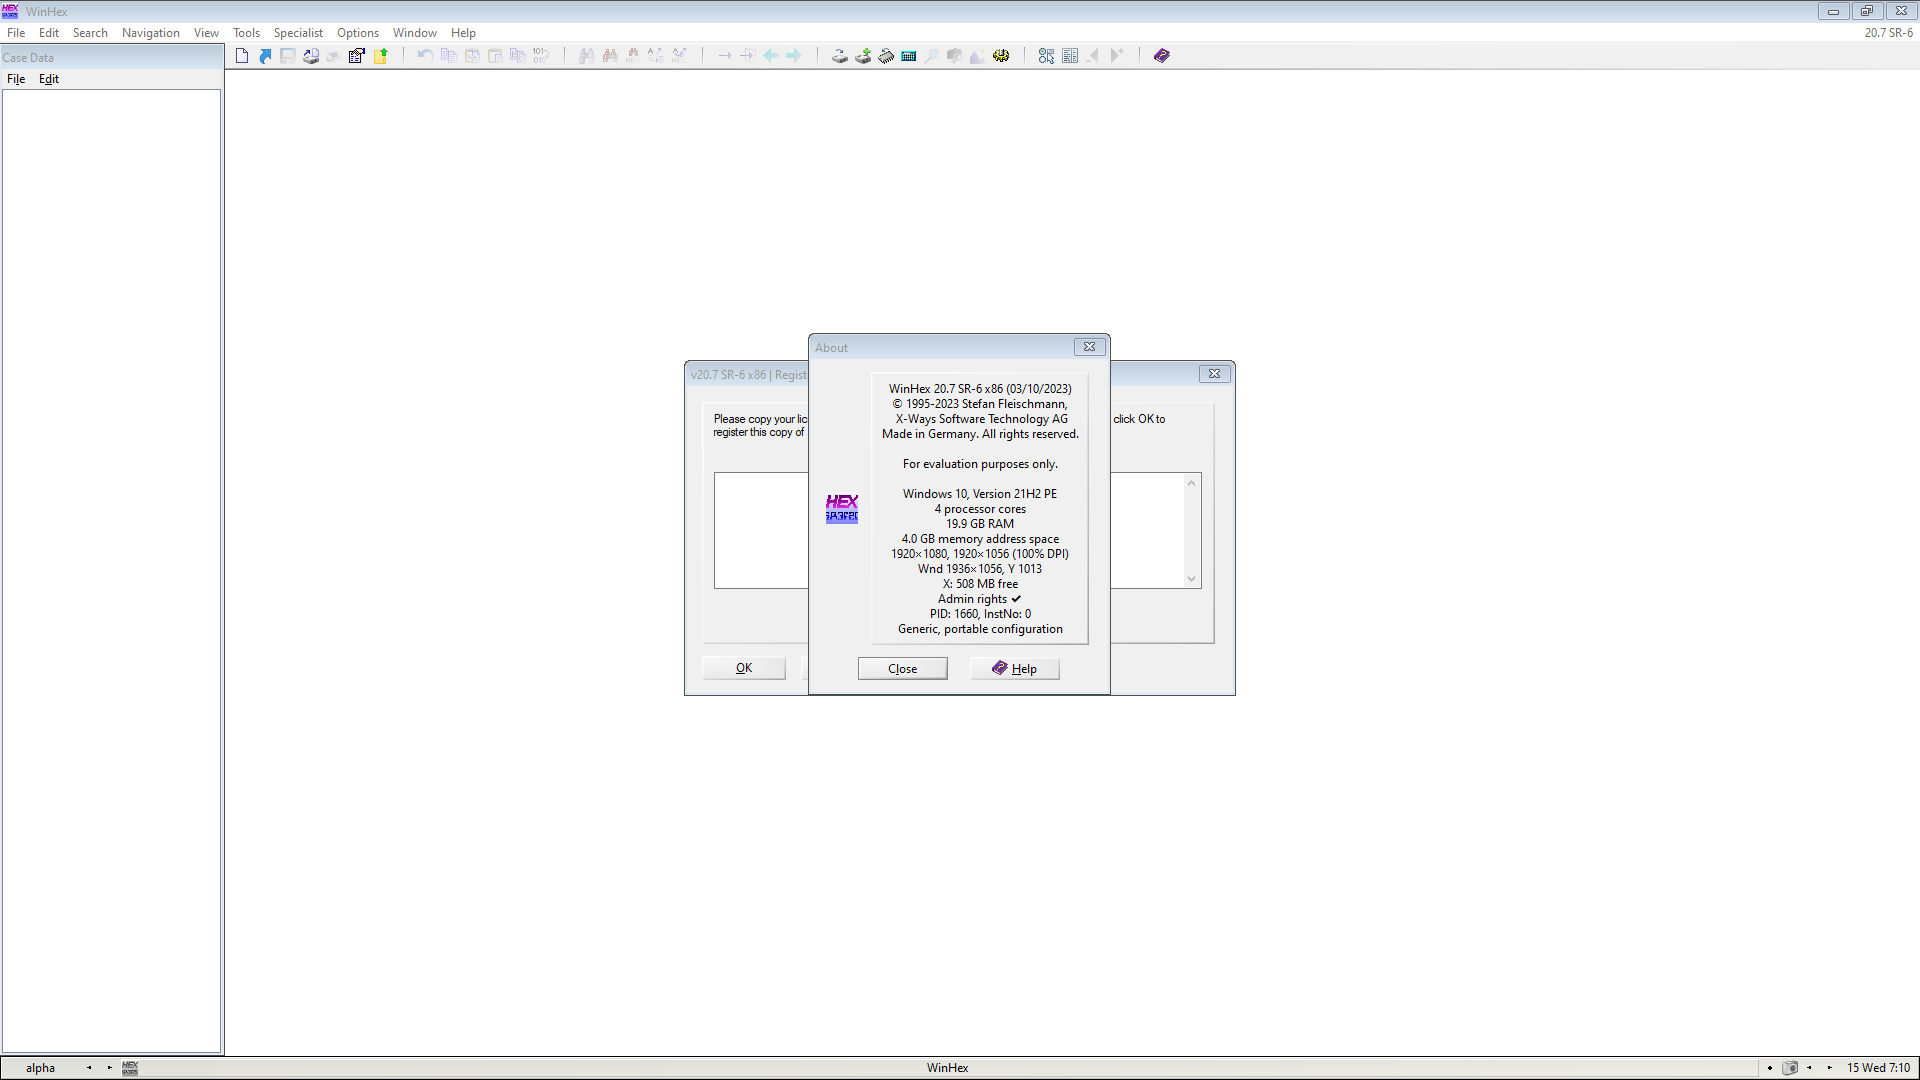
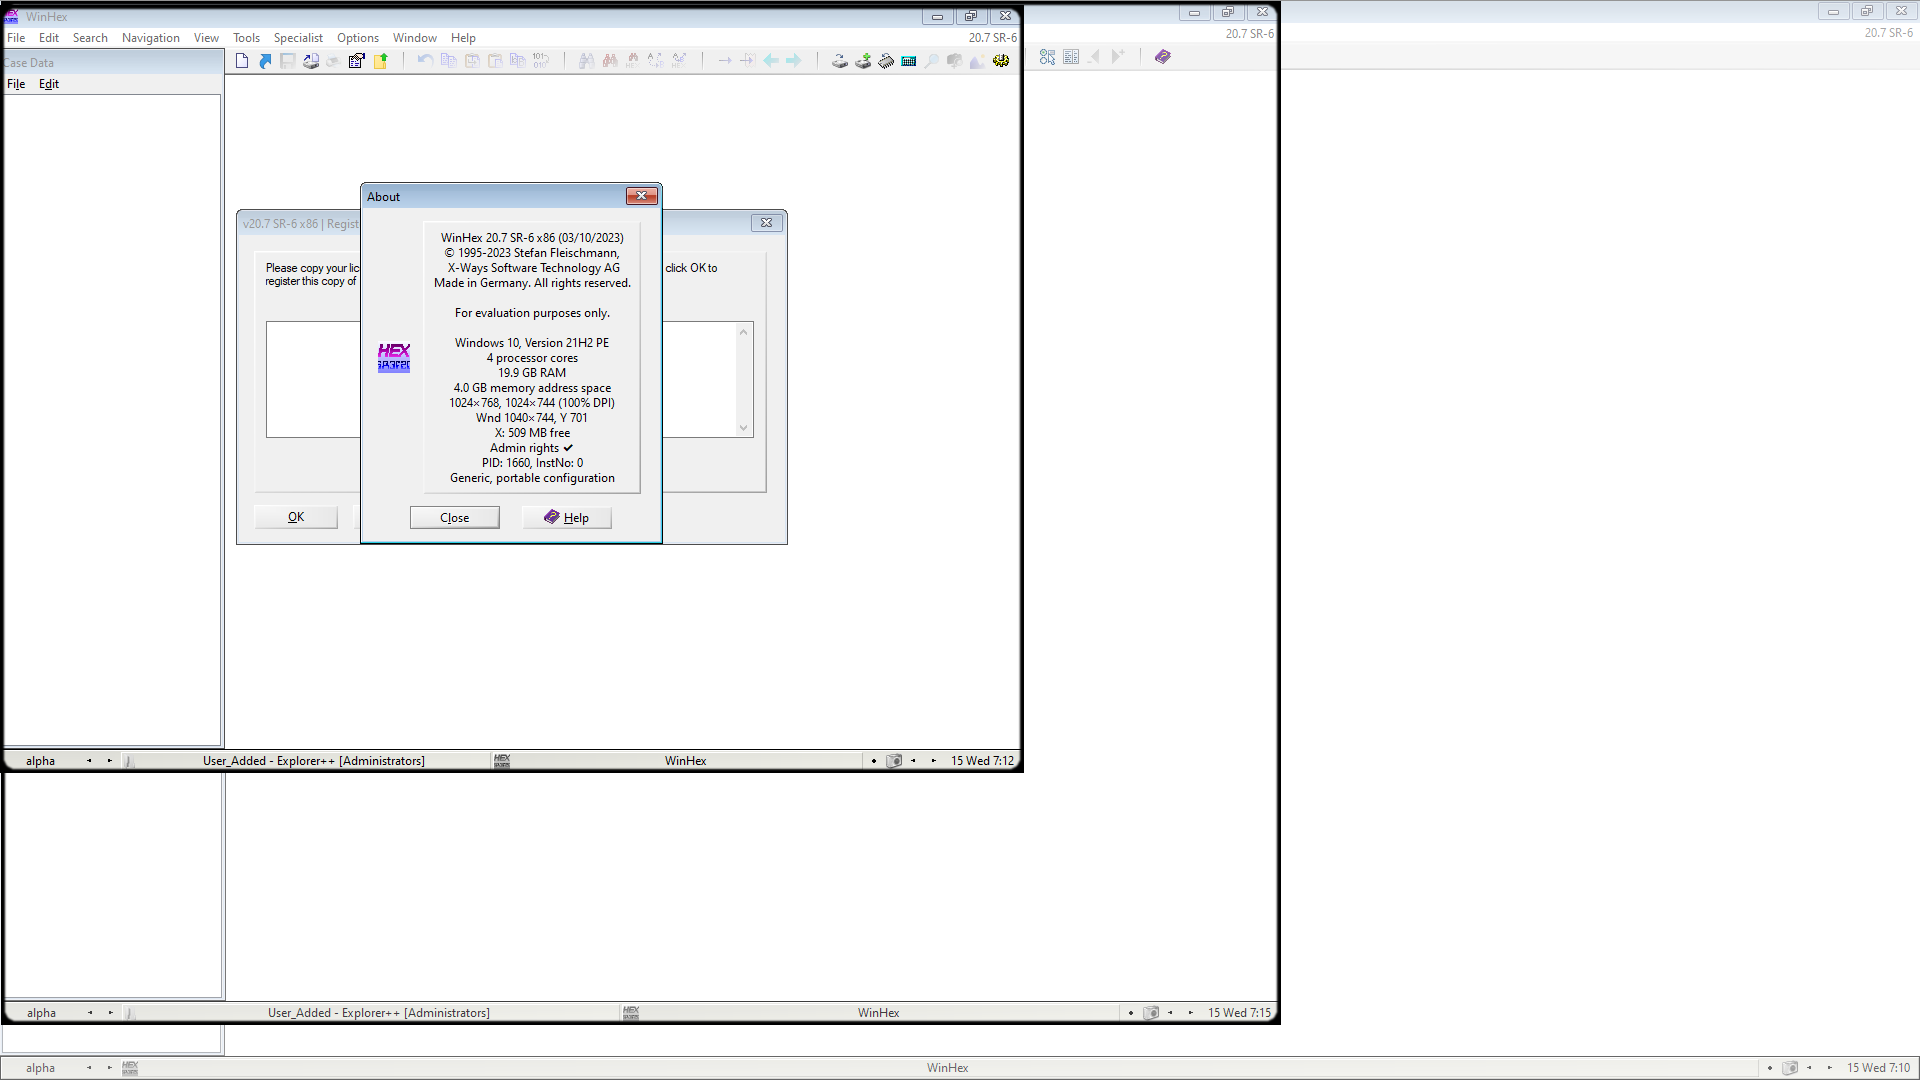
The ThinkPad T470s test system has a physical panel size of 14". Running in FHD on this display panel, WinPE and Windows set a scaling level of 150%
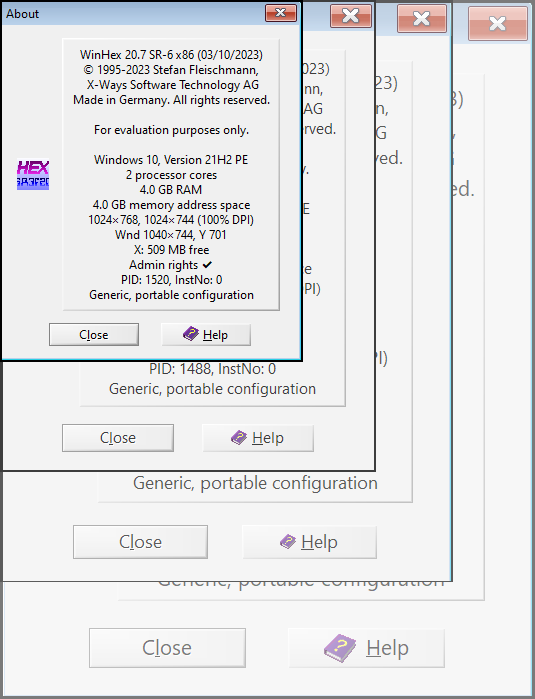
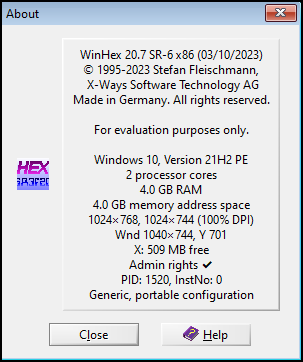
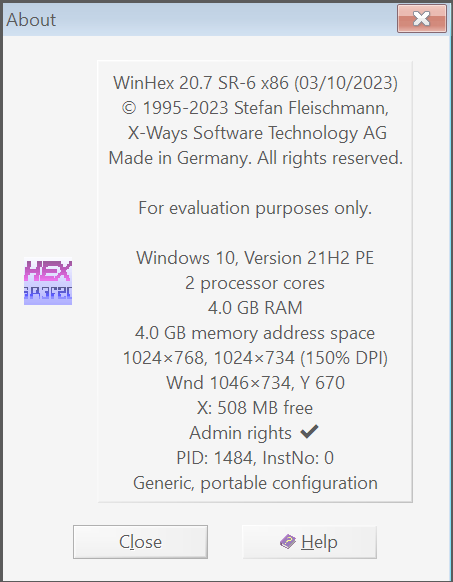
Example showing an overlay of different scales (100%, 125%, 150% and 175%) all running on 1024x768 screen resolution.
Screenshots of the same Windows dialog box using different DPI scales running on a 1024x768 screen resolution (click on the thumbnail for the full image) -
 |
 |
 |
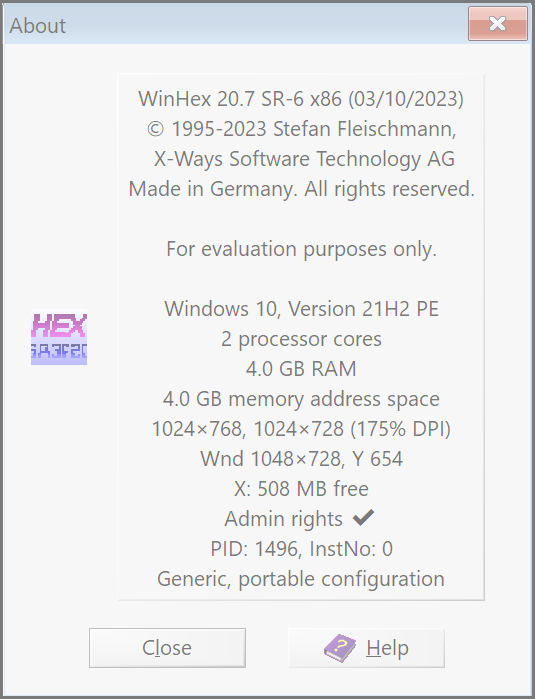 |
| 100% | 125% | 150% | 175% |
DPI scale factors listed on a Microsoft Windows Hardware Developer webpage (see here) -
| DPI (LogPixels value) | Scale factor |
|---|---|
| 96 | 100% |
| 120 | 125% |
| 144 | 150% |
| 192 | 200% |
The same Microsoft documentation indicates that a wider range of custom scale factors can be set, between 100% to 500% ("....By using the custom setting, the user can select values other than 100%, 125%, 150%, 200%, although they are limited to the range (100%-500%). ...")
| DPI (LogPixels value) | Scale factor |
|---|---|
| 96 | 100% |
| 120 | 125% |
| 144 | 150% |
| 168 | 175% |
| 192 | 200% |
| 216 | 225% |
| 240 | 250% |
| 264 | 275% |
| 288 | 300% |
| 312 | 325% |
| 336 | 350% |
| 360 | 375% |
| 384 | 400% |
| 408 | 425% |
| 432 | 450% |
| 456 | 475% |
| 480 | 500% |
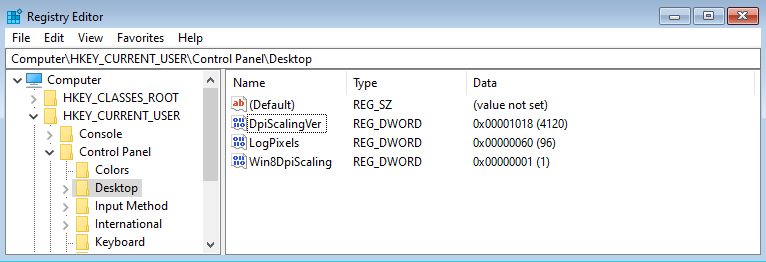
The information in this section has been adapted from an article by Michael Albert - Windows PE: Disable DPI autoscaling. Based on the information provided by Michael, adding three registry settings will disable auto scaling and will set a fixed custom scaling level. The following registry settings need to be applied to an offline WinPE image (with keyname edited to refect the mount point used for the offline registry hive) -
regedit screenshot showing the above registry entries in a running WinPE -
Paths/settings used in this section -
| Path/setting | ? |
|---|---|
| d:\boot.wim | path to .wim file containing WinPE |
| 2 | index/image number (in d:\boot.wim) containing WinPE |
| D:\wimmount | mount directory. The directory must exist in the filesystem. Use an empty directory. |
NOTE/WARNING - .wim files can contain multiple images. Adjust image/index number in the steps below to select the required image. As an example, boot.wim from Windows installation media usually contain 2 different images, with image/index 2 containing WinPE. For an overview of the Windows Image (WIM) format, see here.
The Deployment Image Servicing and Management tool (DISM) is backwards compatible, however previous versions of DISM may not support all commands when newer WinPE versions are used. The DISM /Mount-Image command is utilised in these instructions. For information about the /Mount-Image command syntax, enter the following in a command prompt
Mount the WinPE wim file (mount image 2 in boot.wim to the D:\wimmount directory) -
After mounting the wim image, follow the instructions in one of the following sections to add registry settings before proceeding with committing (saving) the changes back to boot.wim -
Commit/write the changes back to boot.wim -
The wimlib library can be used as an alternative to DISM. wimlib cannot be used to mount .wim files on Windows, however this method can be used to extract the WinPE default registry hive > update the registry hive >: inject the updated registy hive back to WinPE. This method can be scripted, and does not require elevated privilages (if used in conjunction with offlinereg to update the registry).
Paths/settings used in this section -
| Path/setting | ? |
|---|---|
| d:\boot.wim | path to .wim file containing WinPE |
| 2 | index/image number (in d:\boot.wim) containing WinPE |
| D:\wimlib\temp | Work directory - the WinPE default registry hive will be extracted here. |
| D:\wimlib\wimlib-imagex.exe | Path to wimlib-imagex.exe. |
NOTE/WARNING - .wim files can contain multiple images. Adjust image/index number in the steps below to select the required image. As an example, boot.wim from Windows installation media usually contain 2 different images, with image/index 2 containing WinPE. For an overview of the Windows Image (WIM) format, see here.
Extract the default registry hive from image 2 in d:\boot.wim to the D:\wimlib\temp directory -
After extracting the default registry hive, follow the instructions in one of the following sections to add registry settings before writing the updated registry file back to boot.wim -
Inject the updated default registry hive back to boot.wim -
Ensure that the WinPE default registry hive has been mounted or extracted before attempting to edit the registry. Refer to the instructions in the following sections of this page -
Load the default registry hive. Use the following if wimlib was used for offline servicing -
Or the following if DISM was used -
Apply the registry settings, editing the LogPixels value as required (see here for a list of supported LogPixels settings/values). In the example below a LogPixels value of 96 is set (100% scale) -
Unload the default registry hive -
Ensure that the WinPE default registry hive has been mounted or extracted before attempting to edit the registry. Refer to the instructions in the following sections of this page -
offlinereg can be used as an alternative to reg.exe to add settings to an offline WinPE registry hive. This method can be scripted, and does not require elevated privilages. An offlinereg guide is available here.
Apply the registry settings, editing the LogPixels value as required (see here for a list of supported LogPixels settings/values). In the examples below a LogPixels value of 96 is set (100% scale).
Use the following commands if DISM was used for offline servicing -
Or the following if wimlib was used -
Document date - 16th March 2023