Instructions
This release is a substantial rewrite of the MiniXP project - support has been added for a greater range of source files to be used to create the build.
Please refer to the Required Files section for some notes on which files are required and where to copy them before running winbuilder.
Important - Please read the following sections fully to avoid build errors. Please also ensure that there are no spaces in the file path(s) containing this project.
Source Files
Using the correct source files and selecting the appropriate option(s) for them in the Core Files project script should result in a successful build every time - please remember that this is a beta release though -
-
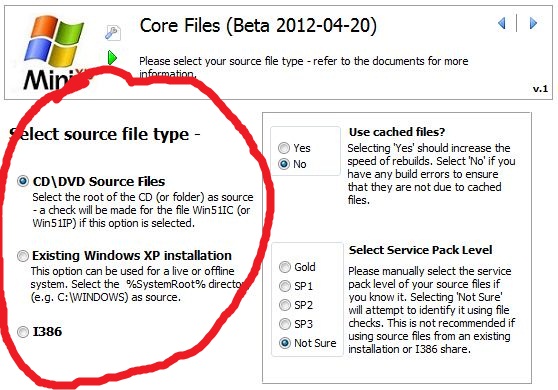
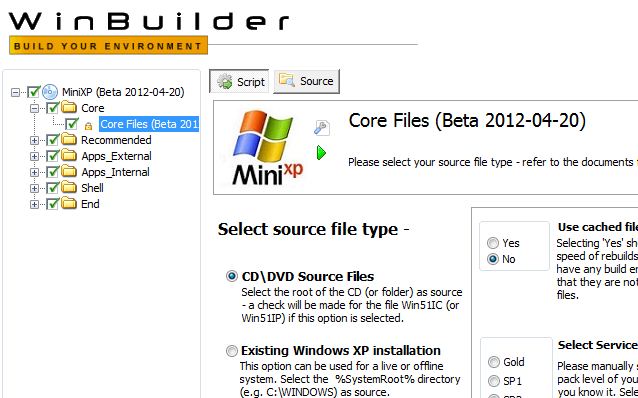
CD\DVD - this includes a CD image file (e.g. an .iso type file) and files copied from a CD to a local directory. Ideally this will be a Microsoft hologrammed CD and not an OEM recovery disc. Some OEM discs may work, however it depends on the structure of the disc. Select the root of the CD (or mounted disc image file, or directory) as the source in steps 3-4 (see below) - e.g. set source as D:\. A check is made for the file WIN51IP or WIN51IC - if one of these files is not found then the build will be aborted.
-
Existing Windows XP Installation - use this option to create the project from a running or offline Windows XP operating system. Select the SYSTEMROOT directory of the XP installation as source in steps 3-4 (see below) - e.g. set source as C:\WINDOWS. A check is made for the file \System32\prodspec.ini - if this file is missing, or doesn't contain the correct entry for a Windows XP operating system, then the build will be aborted.
-
I386 - use this option to create the project from an I386 folder share. This could possibly include a network share or a local folder. You could also try using this option if the CD/DVD Source option doesn't work due to missing marker files. Select the I386 directory as source in steps 3-4 (see below) - e.g. set source as C:\I386. A check is made for the file prodspec.ini - if this file is missing, or doesn't contain the correct entry for a Windows XP operating system, then the build will be aborted.
I have done my best to allow for non standard source files to be used, however I cannot guarantee that all source types will work. There are too many variables that I cannot test, including - OEM sources, having driver packs slipstreamed, hotfix updates, files not in the default places, etc.
Project Cache
Most of the files extracted from the project scripts will be added to the Cache directory (%BaseDir%\Projects\Cache). Selecting the option to "Use Cached Files?" in the Core Files script will additionally copy service pack specific core files to the cache for use on re-runs of the build. This can significantly increase the build time, but can result in errors if the cached files were not created successfully or the service pack is incorrectly identified.
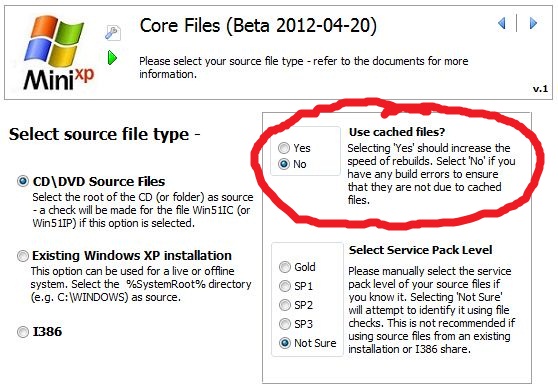
I would recommend that you select this option only after completing at least one successfully build. In the event of any build errors on project re-runs, simply unselect this option or alternatively delete the cached files manually.
In my test on a Samsung NC10 netbook (with Windows 7 (SP1) Host Operating System), a normal build was completed within 37 - 40 seconds when processing the core files only using CD source files. The build process took only 7 seconds when using cached files on a subsequent rerun of the project.
Service Packs
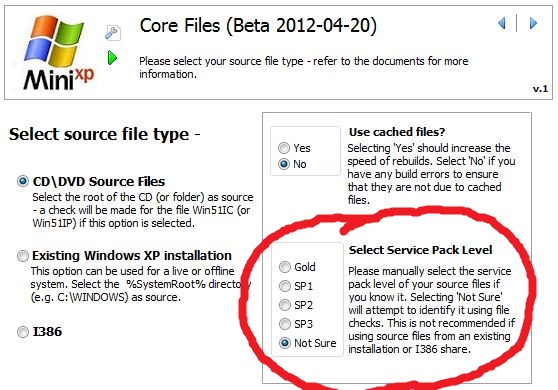
Please manually select the service pack of your source files if you know it. If you are not sure, then select Not Sure - attempts will then be made to identify it correctly by checking for marker files at the root of CD sources (e.g. \win51*.SP1), or SP .cab files for the other source types (e.g. \Driver Cache\i386\SP3.CAB for an existing Windows XP installation, or \SP3.CAB for an I386 folder share)
Running WinBuilder
-
Before running WinBuilder, please note that the following project directories will be deleted before each build if they exist (Note - %BaseDir% is a WinBuilder variable for the folder from which WinBuilder.exe is running.
- %BaseDir%\ROOT (the default %TargetDir%)
- %BaseDir%\IMG
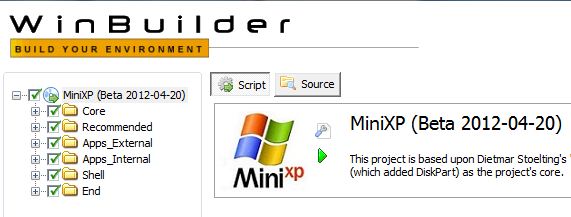
- When Winbuilder.exe is first run, you should see a screen similiar to the following (the folder tree on the left can be expanded so that individual script options can be selected or disabled as required) -
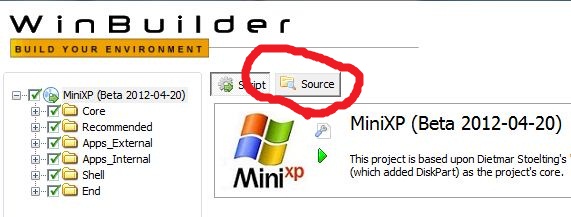
- Click on the Source button to set the path to your Windows XP source files (remember to adjust the path depending on the type of source files you are using (see Source Files)) -
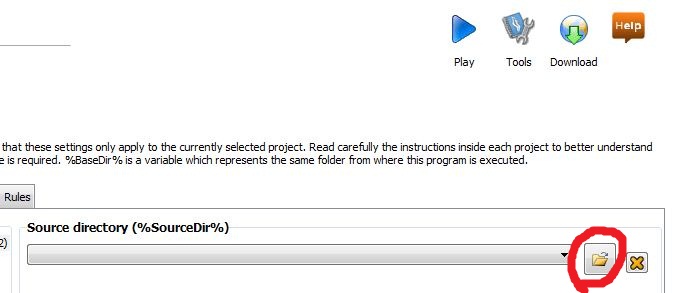
- Click on the folder icon to the right of the Source Directory box to browse to the drive containing your Windows XP source files (e.g. D:\ for CD, C:\WINDOWS for an existing Windows XP installation, or C:\I386 for an I386 folder share) -
- Click on the Script button to display script options -
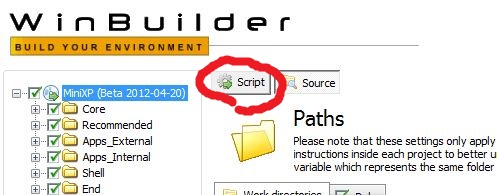
- Now expand the folder tree on the left and view and select individual project script options as required (refer to the Project Scripts section for details about all included project scripts). E.g. expanding the Core tree and clicking on Core Files will display the following options for the Core Files script -
- To start the build process, click on the big blue Play button in the top right of the screen -

- Assuming the default settings are used then the MiniXP project files will be created in the %BaseDir%ROOT folder (e.g. C:\MiniXP\ROOT).
- If any of the options in the Finish script were enabled the minixp.img disk image file will be located in the %BaseDir%\IMG directory (e.g. C:\MiniXP\IMG\minixp.img)
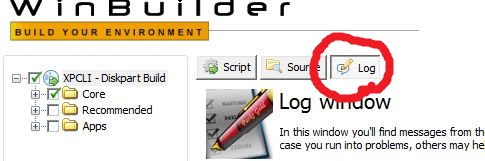
- Please check the log file after running Winbuilder to look for any errors or warnings. The log file can be viewed by clicking on the Log button -
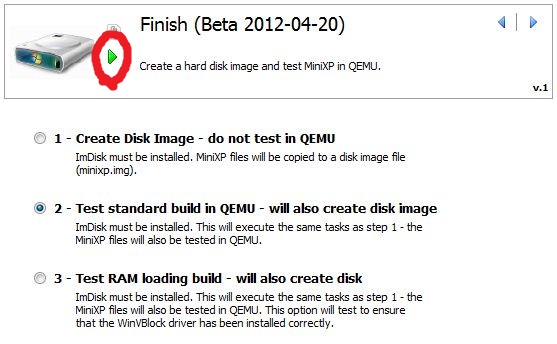
Retest without Rebuild
To use this feature, select the Finish script and choose the required option.
-
If the Test Standard Build in QEMU option is enabled, a search is made for the disk image file %BaseDir%\IMG\minixp.img.
-
If the Test RAM loading build option is enabled, a search is made for the disk image file %BaseDir%\IMG\RAMBootTest.img.
If the relevant disk image is missing then an attempt will be made to build it - provided the required files are present in the %BaseDir%\ROOT directory.
Once you have selected the required option, click on the script play button (the green button to the right of the script logo) -